How to Install an Additional Hard Drive
Installing an additional hard drive is a fairly straightforward process and can be done in a relatively short amount of time. The only tools you will need are a Philips head screwdriver and a pair of wire snips. You will also need a SATA data cable and a SATA power cable (sometimes called a SATA chain because there are multiple connectors on each cable). Most SATA chains have at least three connectors while some have four. Depending on the power supply in your system, there may be additional SATA power cables in your accessory bag that came with your system. This means your power supply is modular or semi-modular. If there are none, then your power supply is non-modular and all SATA power cables are already in the system. You still may be able to add more hard drives, but you will be limited by the number of SATA power connectors that are unused and the length of the cables, as well as by the fact that these cables are zip tied down in numerous points in the case. If at any point you feel uncomfortable, please give our support team a call for assistance.
For each case you will need to remove the side panels. If you are unsure how to remove them, please check our guide on how to remove side panels.
This guide will be broken into three sections. 1) how to add rubber grommets and mounts to your drives to prep for installation, 2) how to physically install a hard drive in your system, and 3) what to do in Windows to make your drive usable.
1. How to add rubber grommets and mounts to your drives to prep for installation
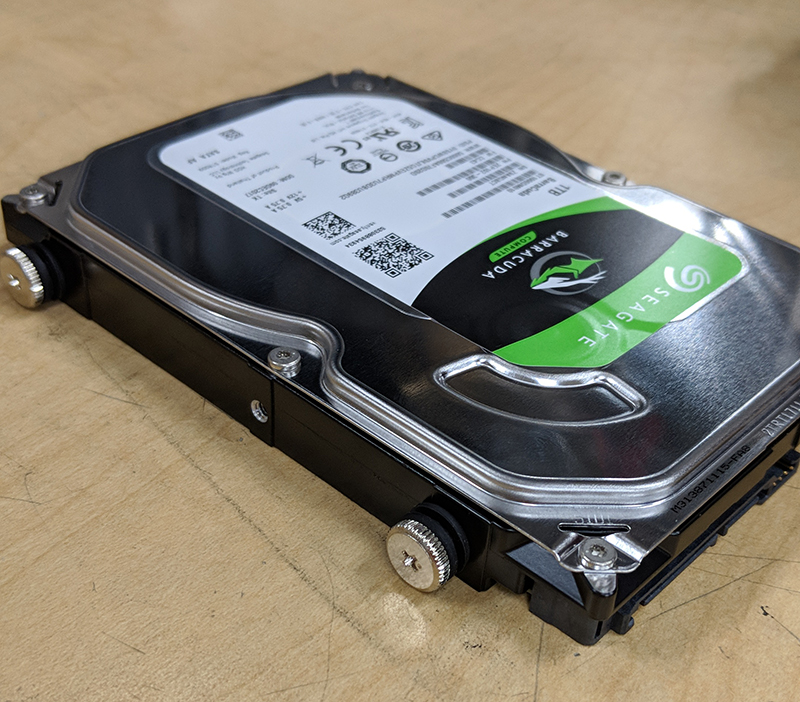
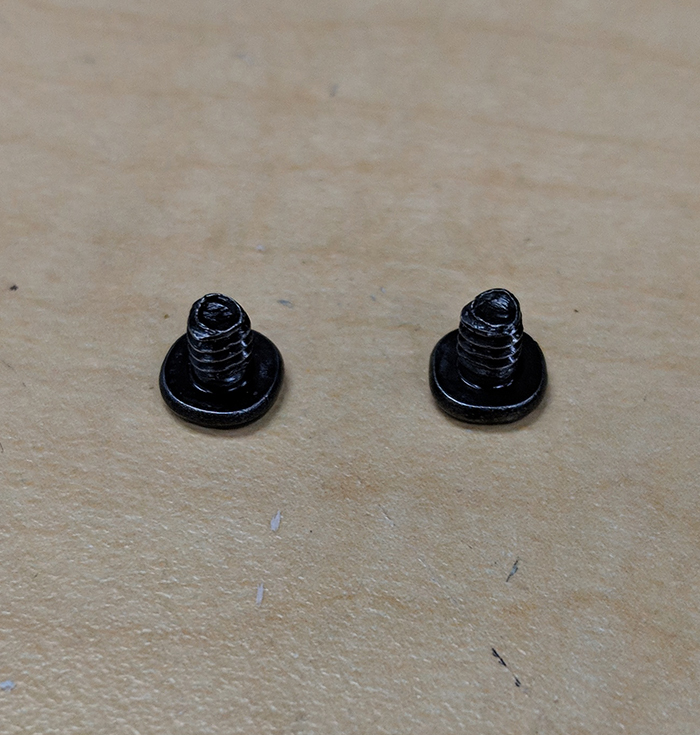
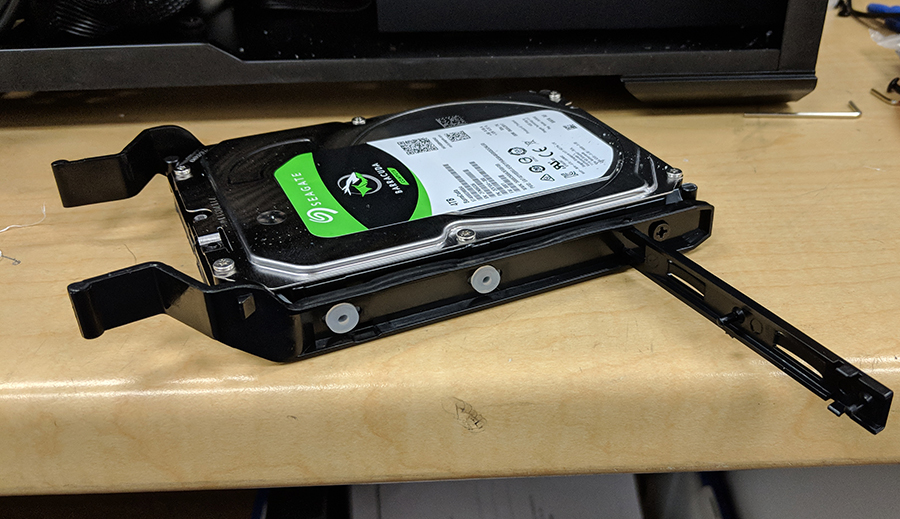
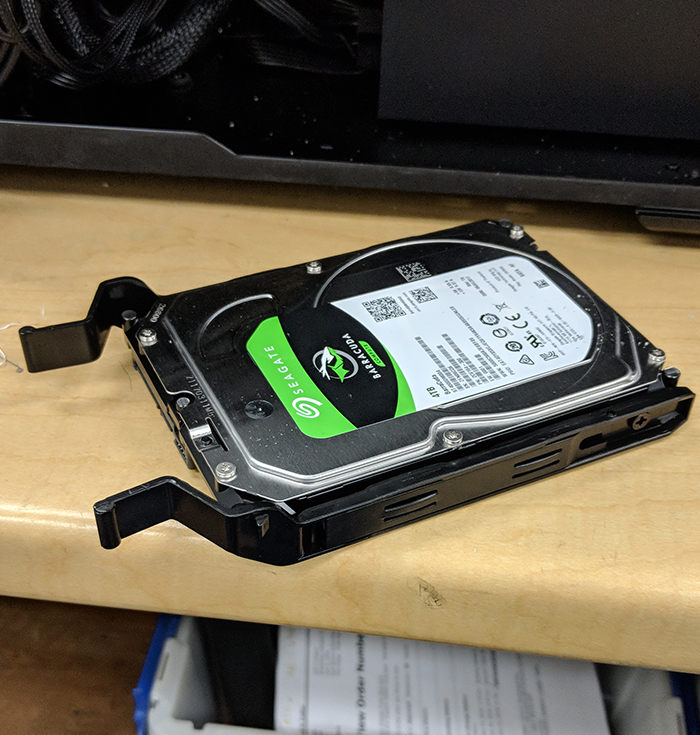
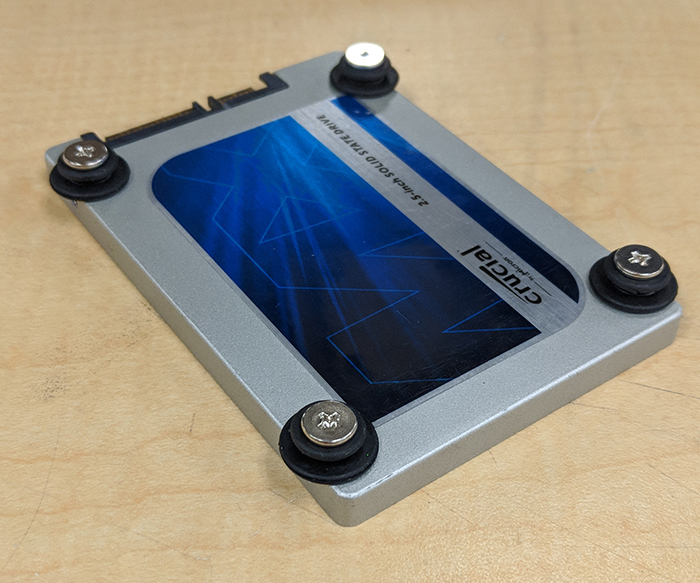
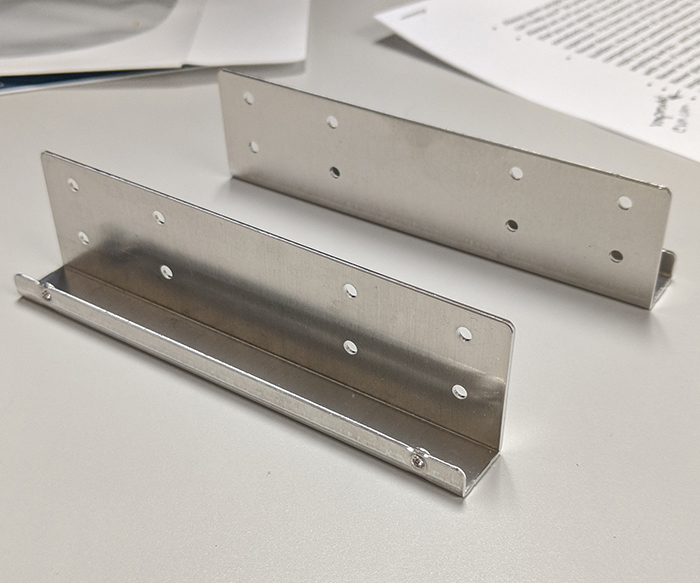
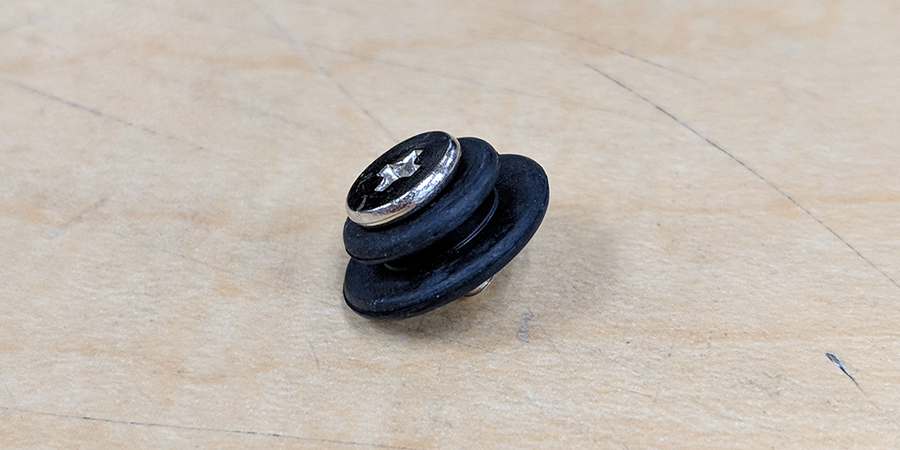
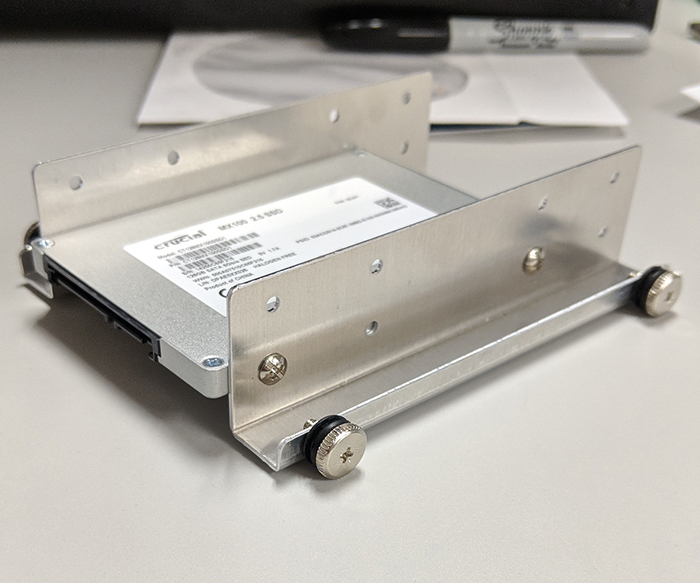
Each Velocity Micro system comes with a small bundle of screws and grommets needed to add additional drives your system. One thing to note is that if your system was purchased with an SSD (Solid State Drive) then there will already be metal 3.5” adapters in your system. If your system does not already have an SSD, then these will be in the same bag as the screws and grommets. Start by opening the accessory bag and finding four silver thumb screws and four black rubber grommets. If you are adding an SSD, then you will need the metal brackets and four small silver screws in addition to these. For a regular 3.5” mechanical drive, you will need to fit each thumb screw with a rubber grommet. Most hard drives have six screw holes lining the edges of the drive. You will need to insert screws into the outer two on each side, not the middle ones. See the picture for an example. SSD’s need to be mounted a little differently. Each of the metal brackets has eight screw holes separated into two rows. You will want to use the lower row to mount the SSD (you can use a single pair of brackets to mount two SSD’s if you need to). See the example picture for a better idea. Repeat for both sides and then install the thumb screws and grommets the same way you would for a hard drive. Now it’s time to insert the drive into the cage.
2. How to physically install a new hard drive
VX Case
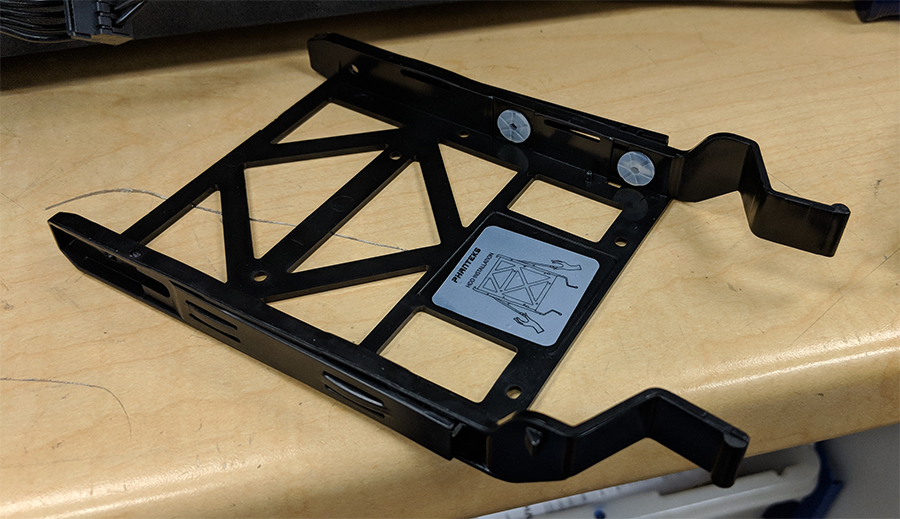
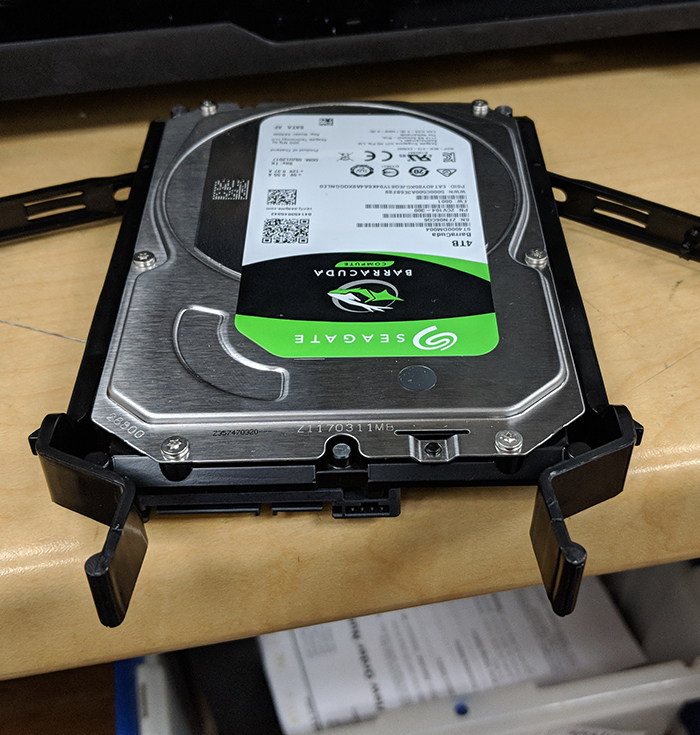
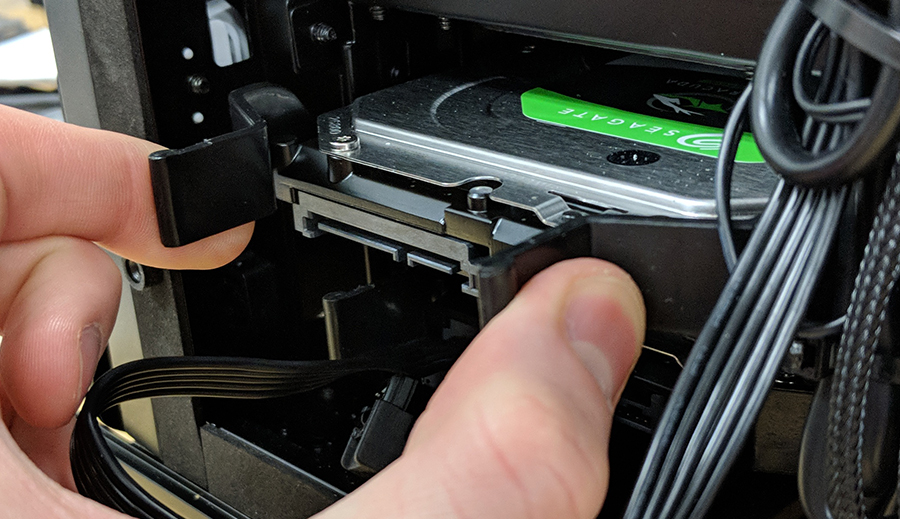
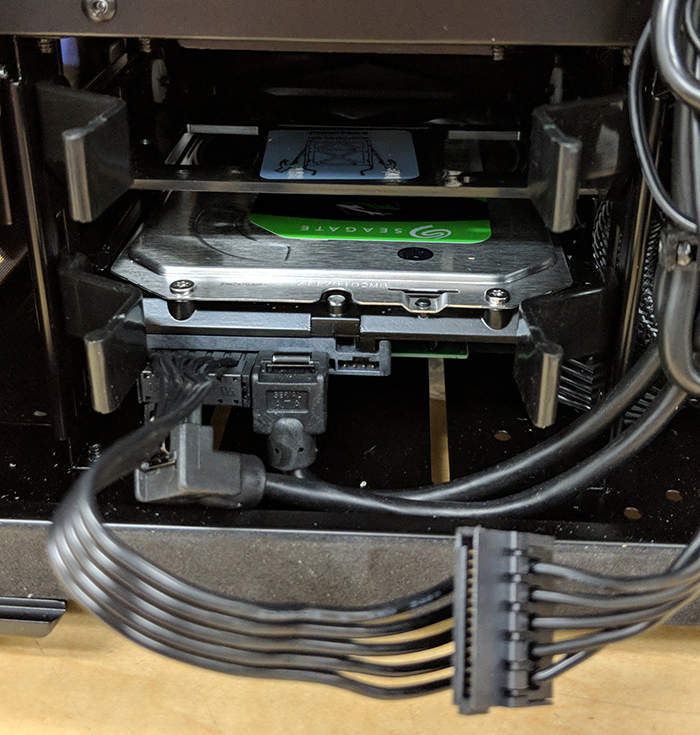
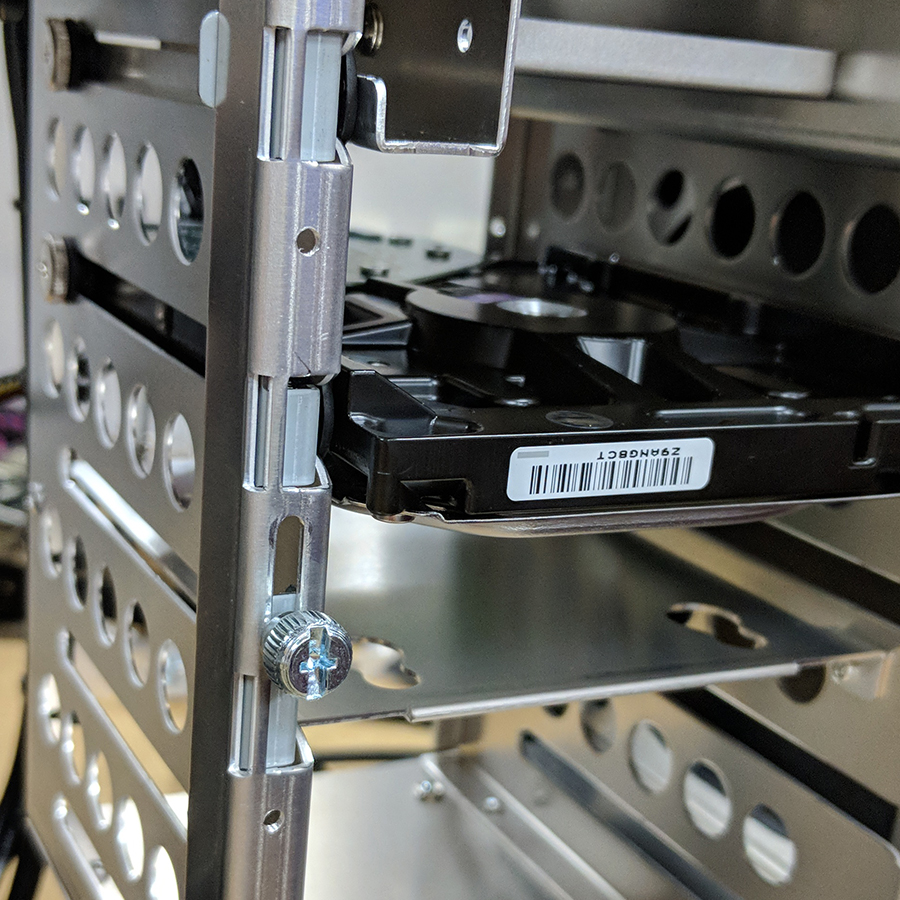
The VX has a spot in the bottom front of the case for two 3.5” drives, which are held in removable trays. Start by removing both side panels and turning the case around so the back of the motherboard is facing you. If you look in the bottom left of the case, you see two drive trays that can slide out towards you. Each of the trays has a locking mechanism on either side that swings out on a hinge. Each arm has two pegs that align with the screw holes on the hard drive.
NOTE: If you have a high capacity drive such as an 8 TB or higher, the screw holes may not line up properly. The tray is a tool-less design and does not need any screws to secure; simply push the arms back in place until they click and slide the tray back into the case.
Now add the SATA cables. If you have one of our VX cases, then chances are you also have a modular power supply. Unfortunately, the power supply in a VX case is contained in a basement below the rest of the internals. It can’t be accessed from the front, so you will need to unscrew the power supply and slide it out partially to access the SATA plug. There are four black Philips head screws on the back holding the power supply in place. Once they’re removed you can push gently on the power supply to slide it out of place and pull it partially of the case. Be aware that there are a lot of cables running from it and some of them may be tight, so be careful to not put too much pressure on anything. If you need to, unplug some of the connections to make it easier to work with, but just remember to plug them back in once you’re done. If you are able to safely pull out the power supply and find the SATA connection, go ahead and connect the SATA power cable to the power supply. At this point, you can slide the power supply back in place and secure it with the screws you took out earlier. Make sure to tuck the loose cables back in the basement to keep them out of the way. Now you need to run the SATA cable to your hard drive. It’s important to note that both the SATA data and SATA power cables have a correct orientation for being plugged in. If you look at each cable, you will see that both have an opening in the shape of a sideways “L.” Drives also have this shape on their connectors. Make sure to line them up properly or you risk damaging the connectors. Next, you need to connect the SATA data cable to your drive. SATA cables come in two varieties - straight connector and 90° connector. Either one will work in most cases, but there are some instances where you may want to use one rather than the other. In any case, connect one end to an open SATA port on your motherboard and the other in your hard drive. Unlike the SATA power connector, most SATA data connectors have a metal latch that clicks when secured. Make sure that the latch is engaged. Once you’ve connected both cables, it’s time to close up the case. If you have any zip ties of your own, you can use them to clean up the wiring and make everything look a little neater. It’s not strictly necessary, but it just looks better.
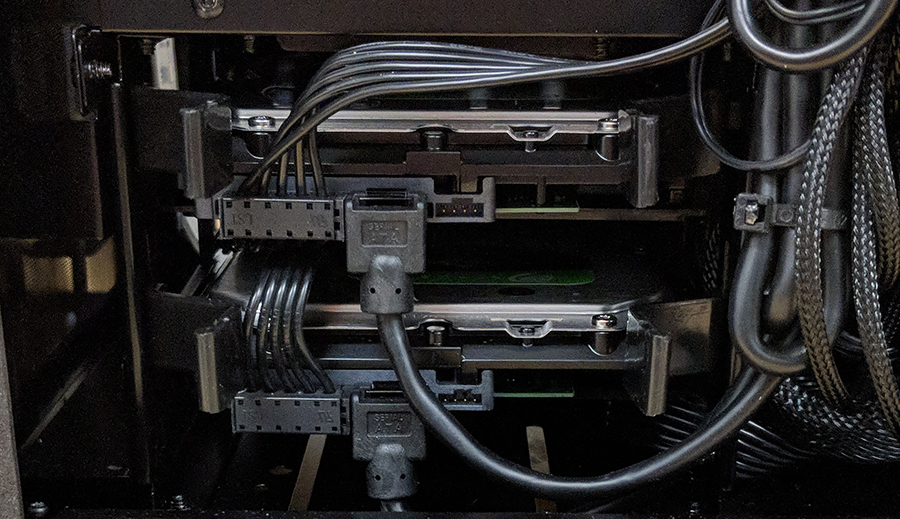
GX4/5, MX3 Cases
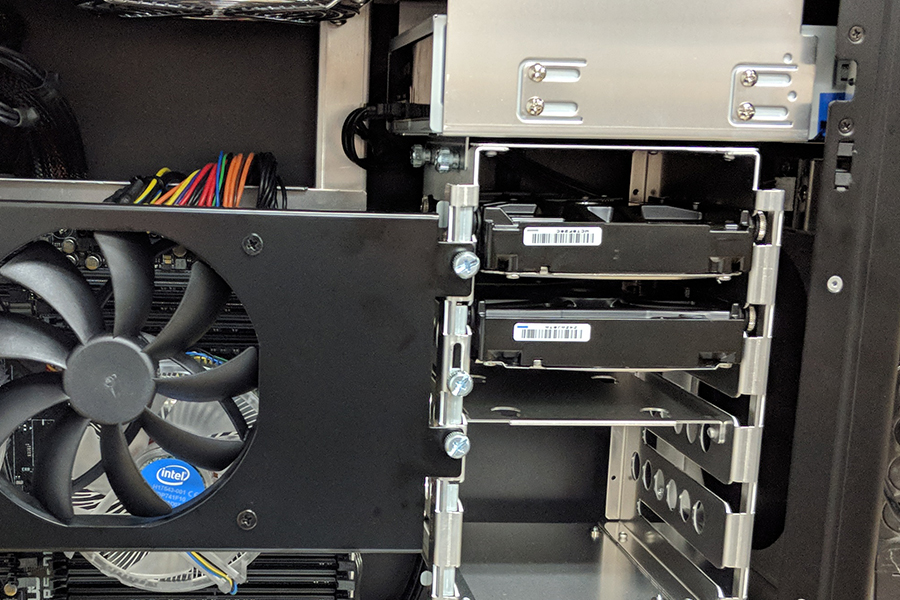
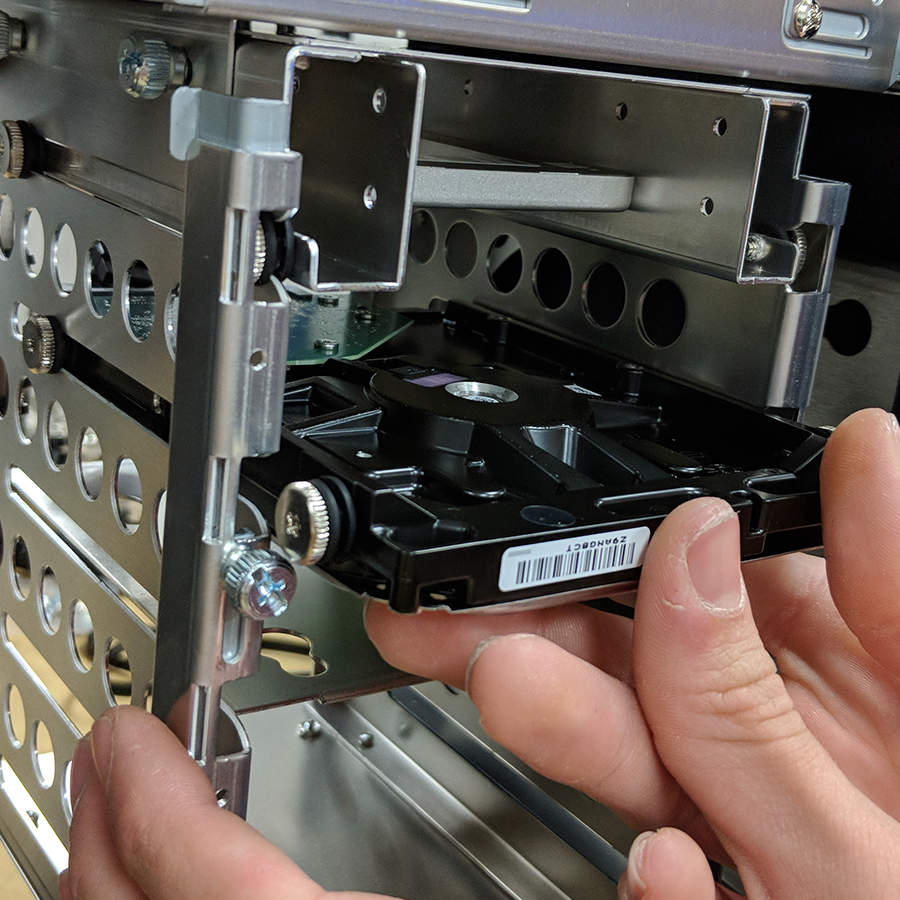
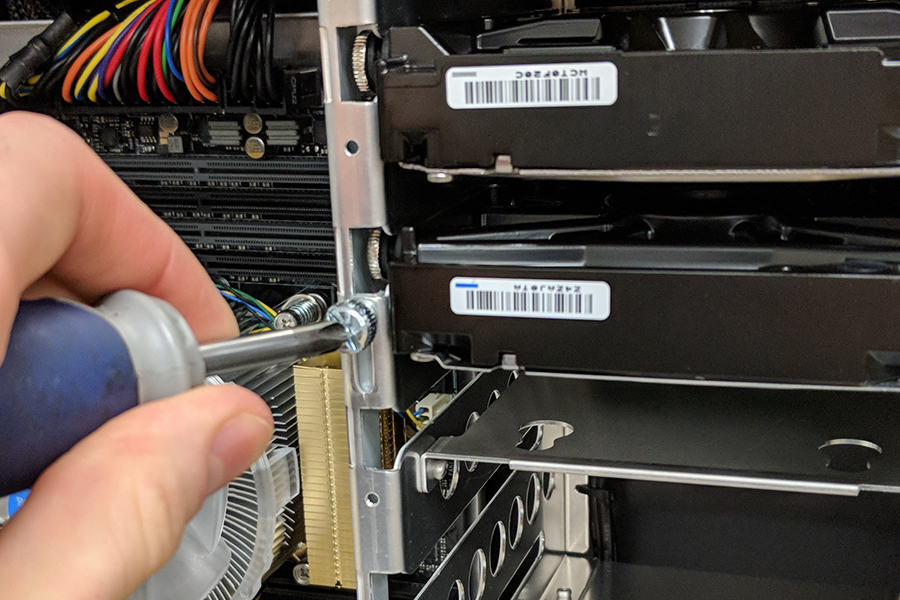
The GX4 and MX3 cases use the exact same drive cage, so the process for adding a drive is the same for both. Both cases can support up to five 3.5” drives. Begin by removing both side panels. Turn the case so that you are looking directly at the motherboard. In front of you will be the door that holds the two optional side fans, and on the right side of the door should be three thumb screws arranged vertically. The middle one is used for the retention bar that holds the hard drives in place. Use a Philips head screwdriver to partially unscrew it. Don’t completely unscrew it as that will cause the retention bar to fall out, but just enough so that you can slide it up and down. With the bar slid up, insert your drive into the cage so that the SATA ports are facing away from you. Once you’ve fully inserted all of the drives you plan to add, go ahead and let the retention bar fall back into place and tighten the thumb screw with a screwdriver. Once it’s secured turn the case around to access the back. If your power supply is modular, then go ahead and connect the SATA power cable to the power supply and then plug in the other end to your drive. Now go ahead and connect the SATA data cable to your motherboard and then to the drive. Safely tuck away any cable slack that you can and put the side panels back on. Again, zip ties are great for cable management, but not required.
NX case
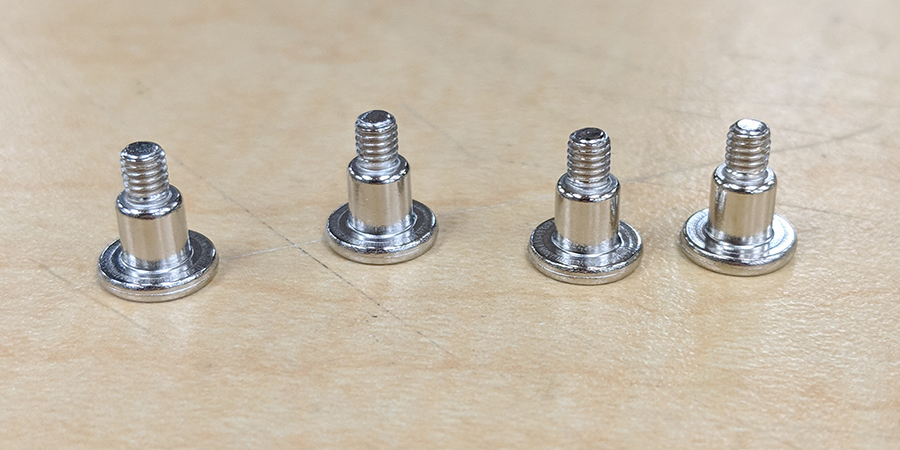
The NX can support up to three total drives, either two SSD’s and one 3.5” mechanical or one SSD and two 3.5” mechanical drives. However, as stated in our guide for replacing video cards, the NX is a small case, and it can be fairly difficult to add or remove anything. If at any point you feel uncomfortable or are unsure of how to proceed, please call our support team. If you plan on adding a 3.5” hard drive, then the procedure is exactly the same as the GX4 and MX3. Four silver thumb screws and four rubber grommets in the outer screw holes of each corner. The procedure for adding an SSD is a little different, however. The accessory bag that comes with an NX includes some smaller screws that are roughly the same shape as the larger thumb screws. You will need four of these as well as four rubber grommets. Put the grommets on the screws, but instead of putting the screws on the side of the SSD, they need to go in the bottom of the SSD. There are four holes for four screws on the bottom of an SSD. Depending on your original configuration from Velocity Micro, the number of available spots for additional drives may vary. Both an SSD and a mechanical drive can be installed vertically in the front of the case, however only a mechanical drive can be installed in the bottom spot and only an SSD can be installed in the top slot.
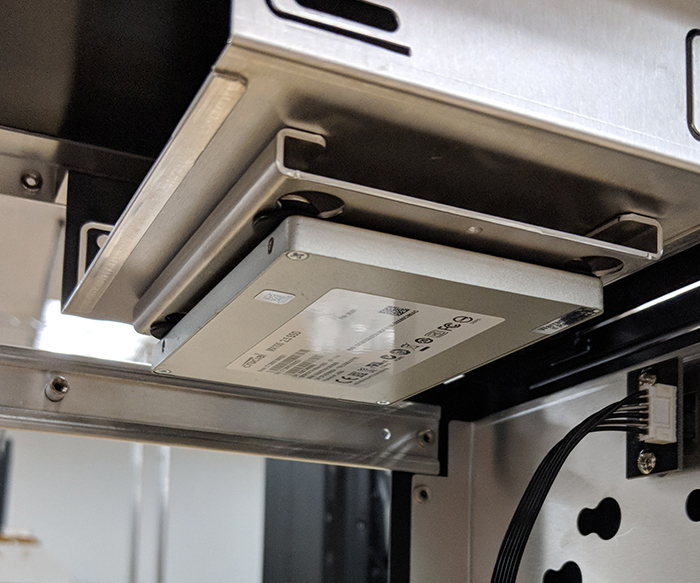
We’ll start with adding an SSD to the top slot since it’s fairly straightforward. Underneath the bay for the optical drive you will see there are four cutouts. Take the SSD and flip it over so it’s upside down with the SATA connectors are facing the back of the case. Now align the grommets with the cutouts below the optical bay and press it flat against the bottom of the optical bay and sliding it towards the back of the case at the same time. You should be able to feel the grommets move into place. Now your SSD is securely installed but still needs to be connected to power and data. Attach SATA power and data cables as needed and you should be good to go.
As stated earlier, you can install a hard drive in either the bottom bay or on the front below the optical drive. The bottom bay is recommended over the front, partly because it is easier to install and partly because it is more secure if the case is being moved around. To add a drive to the bottom bay, first install the silver thumb screws and rubber grommets to the drive and tighten them down with a screwdriver. Next, in the bottom of the NX there are metal brackets attached to the bottom of the case. Each bracket has grooves cut out of it that you will need to align the rubber grommets with. Take the back end of the hard drive (the side without the SATA connections), align it with the two cut outs in the back of the metal brackets and then align the front two grommets with the front two cut outs and press down until it slides into place. A fully installed drive should completely flat and level with the bottom of the case. Now you can connect the SATA power and data cables and close up the case.
We do not recommend attempting to work on our Small Block case. If you need to perform any troubleshooting or upgrades, please call our support team.
NX2 case
The NX2 is our newest small form factor (SFF) chassis, and is designed to be both compact and easy to move or transport. The NX2 can take a maximum of 2 drives, either two 2.5” drives or one 3.5” drive and one 2.5” drive. Depending on your motherboard, you may also be able to add one or even two M.2 SSD’s in addition to these drives. This tutorial will go over how to add both an extra 3.5” drive and a 2.5” drive.
Due to the compact size of the NX2, it is strongly advised to remove all of the panels on the case before proceeding. All of the panels are easy to remove, only requiring gentle prying with your fingers. Once all of the panels are removed, orient the chassis so that you are facing the motherboard directly. To the right of the motherboard will be the mounting holes for the 2.5” drive and if you look back at the center of the motherboard and then look directly above it you will see numerous holes for installing either a 2.5” or 3.5” drive. This spot is a little different than what you will in most other cases, as the drive will be mounted upside-down and the SATA connectors will be facing the back of the case.


Now that we’ve determined where the 3.5” drive will go, we need to get the drive ready to be installed. With the accessories that came with your system will be a small bag of screws that you will need to install in the hard drive. Unlike previous Velocity Micro systems and most computers in general, the screws and rubber grommets will be installed on the bottom of the hard drive, not the sides.


Don’t screw them down all the way, if you do it will be difficult to slide the grommets into place. In the next picture you will see which mounting holes will fit the 3.5” drive. Note that one of the screws won’t be visible from the top because it will be obscured by the handle.

Once you have the drive slid into place you can use a screwdriver to tighten down the screws. Don’t worry about the fourth one, three will be enough to hold the drive. Next, we need to connect the SATA power and data cables. This part can be a little tricky, and sometimes it may be easier to connect these cables to the hard drive first and then insert the drives into the mounting holes. If you have the drive installed without the cables, this is what you should see.
The best way to get the cables installed is to do the SATA power connected first.
The SATA power cable will be much easier to connect, though for the easiest possible installation we recommend using a right-angled SATA cable if you have one.


And that’s it for installing a 3.5” drive. Don’t worry about the drive moving, once you have replaced the glass panel, the drive will be completely held in place. Now you just need to connect the SATA data cable to the motherboard and you’re good to go.
Now we’ll cover installing a 2.5” drive. The mounting position for the 2.5” drive is immediately to the right of the motherboard and left of the front fan.
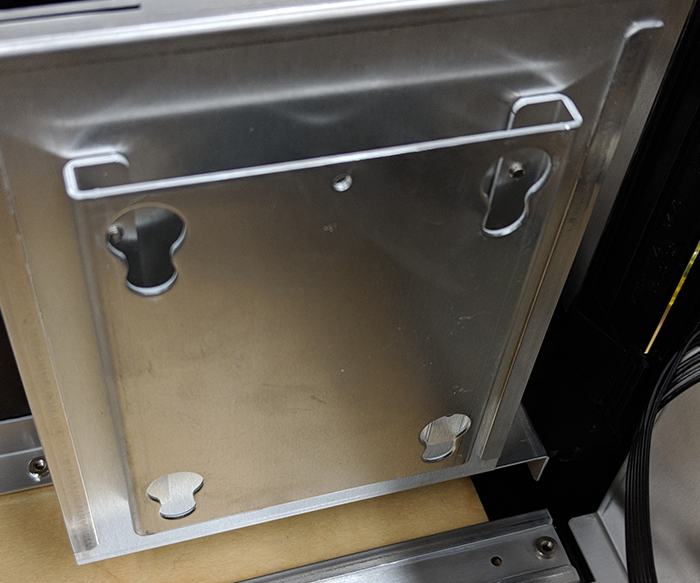
There are only four screw holes available, and the drive will be installed on this side of the panel. Here’s how it looks from the back.
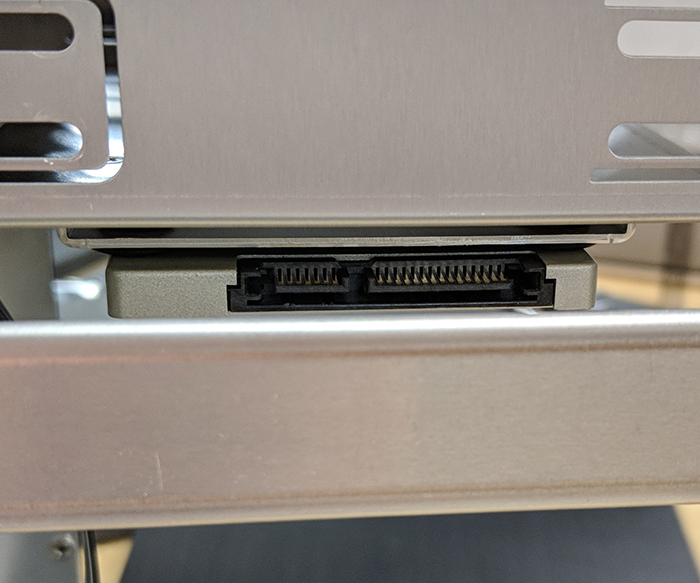
Just like with the 3.5” drive, use the same screws and grommets and install them on the bottom of the 2.5” drive. Now, slide the drive in place so that the SATA connectors are facing downwards towards the bottom of the case.
See that little screw hole over the upper left corner of the drive? That’s for a small thumb screw that is also in the same bag as the other screws.
Go ahead and install that screw. This will keep the drive from moving out of place.
Just like with the 3.5” drive, we recommend using a right-angled SATA data connector if possible, but it’s not required. After that install the SATA power cable and you’re done.


3. Recognizing Your New Hard Drive in Windows
Lastly, we will go over what to do when your hard drive is installed but Windows doesn’t recognize it. If it’s a new, unused drive, you will need to format it before Windows can use it. This is a very simple process. Start by right clicking on the Start Menu in the lower left corner of the screen and choosing Disk Management from the popup. Give it a few moments to scan your disks and if Windows recognizes you’ve installed a new, unformatted drive it will ask if you want to initialize the drive in Master Boot Record (MBR) or GPT (GUID Partition Table) format. Unless you know you need the drive to be configured as MBR, choose GPT. GPT is required for drives greater than 3 TB capacity, as NTFS file systems cannot address more than about 2.2 TB without using GPT. In the bottom half of the Disk Management screen, you will see a list of all your drives and partitions and their associated drive letters, if they have any. On the left you will see the drive numbers, and to the right of that you will see their partitions and volumes. You are looking for a drive that has only unallocated space to the right of it. Right click anywhere in the unallocated space and select “New Simple Volume.” This will bring up a wizard walkthrough allowing you to configure the drive capacity, volume label, drive letter and format options (if it’s a brand-new drive, it’s safe to just do a quick format). Give it a few moments and Windows should give you a notification that it’s ready to use. Make sure to not close Disk Management until the format is complete or it will not finish. If you added a drive that already has data on it, for example from an old computer, it will already be initialized but may or may not automatically be assigned a drive letter. In case it doesn’t, however, simply go back to Disk Management, find the drive that doesn’t have a letter assigned to it and right click in the volume and select “Change drive letters and paths.” A small window will pop up with three buttons, two of which will be greyed out. The one can click will say “Add.” Click that and choose a drive letter from the drop down. Click OK to close both windows and your drive should be good to go.
If your drives do not show up in Windows Disk Management, there may be an issue with either the drive or the cable. Restart your machine and go to the BIOS and check the SATA configuration. Here, it will list all SATA devices that are currently connected to the motherboard and what SATA port they are attached to. If you do not see your device listed, power down the machine and double check the connections to the drive. If it still doesn’t show up, try contacting our support team for assistance.
