Hardware Support
Velocity Micro's award winning Customer Care, the premier source for information on your Velocity Micro PC. To help answer your questions and address support issues, our team of experts have compiled this library of walk-throughs, downloads, and FAQs. This information is updated, expanded, and refined on a daily basis to ensure you have the very latest information available.
Skip to
How to replace a graphics card
Adding or removing a video card is a fairly simple process, and depending on the card, can be done without the removal of any cables. You will need a Phillips head screwdriver, preferably a long one. The process is mostly the same across all of our cases, but we’ll start with the largest cases and work our way down. Always make sure the machine is powered off and unplugged before starting.
GX4/GX5/GX6 Case
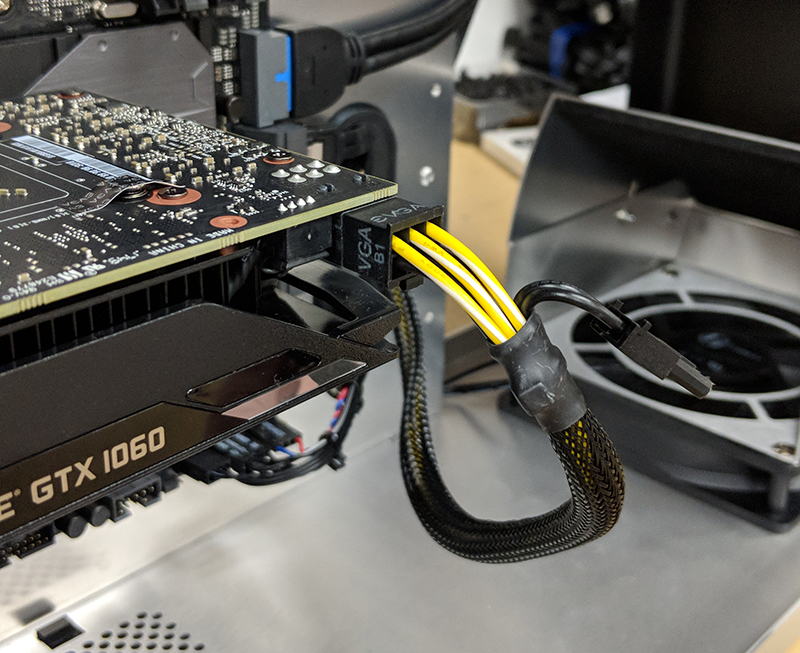
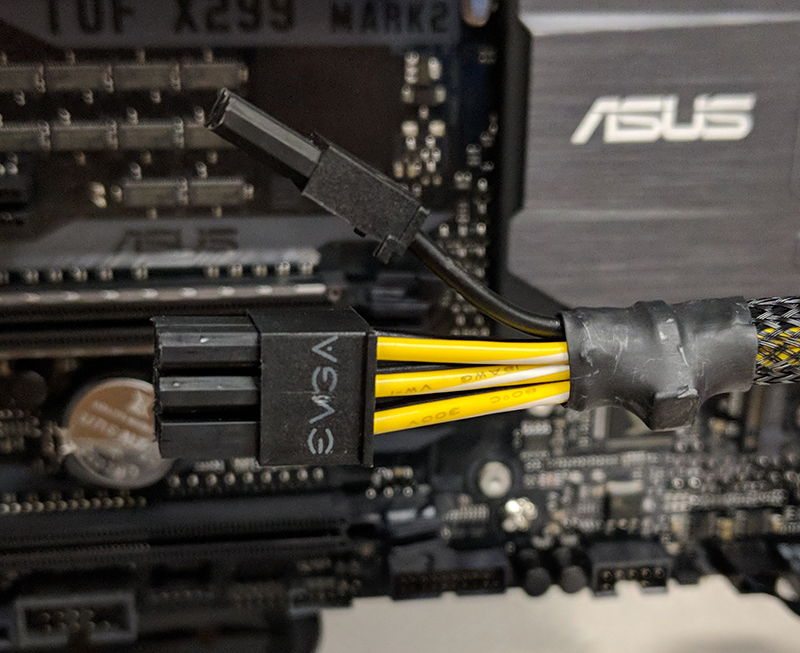
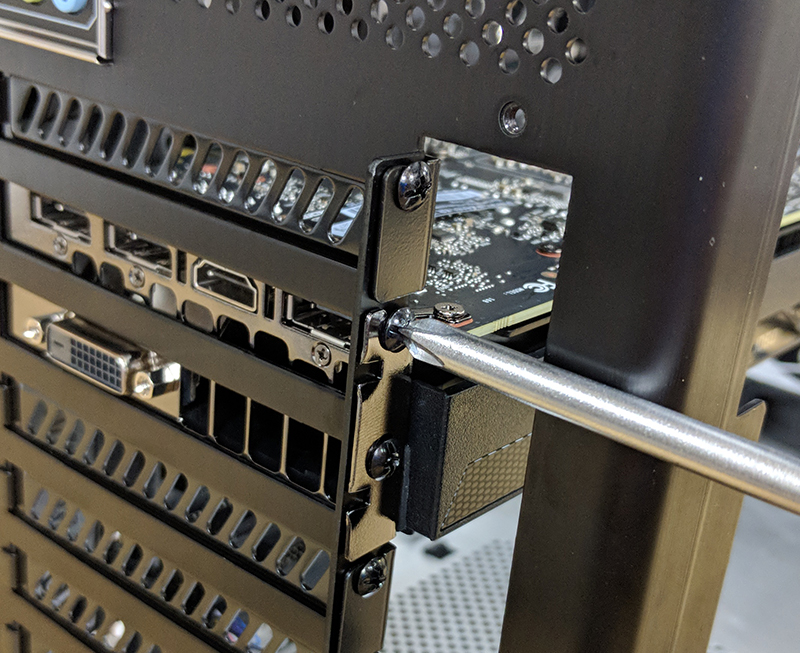
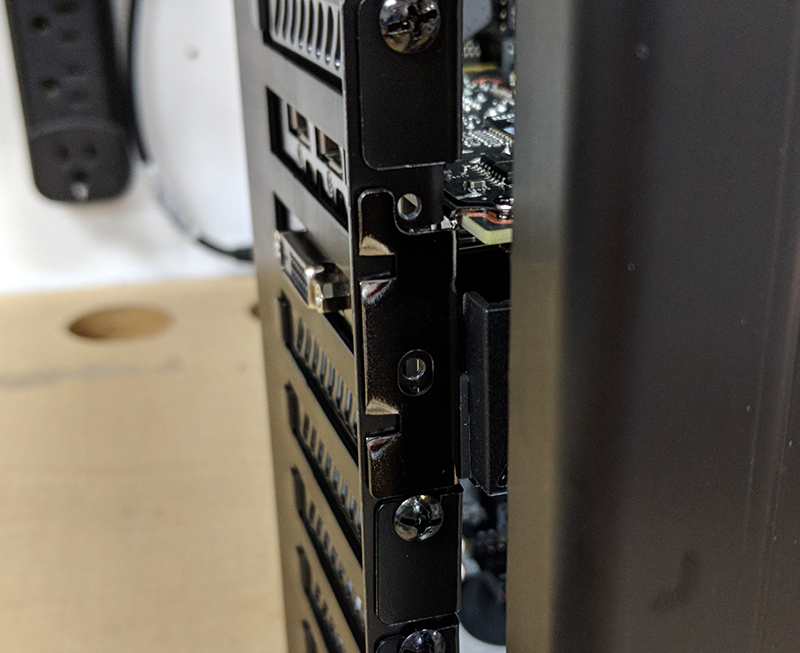
Start by removing the side panel with the mesh opening (in the case of GX4) or clear window (in case of GX5/GX6). For help with how to do that on all of our cases, please see our guide on removing side panels. Once the side panel is removed, unplug the PCIe power cables from the video card, if any (they may also be labeled VGA depending on the power supply). To do so, first find the latch that locks the connector to the video card (this is typically on the bottom of the connector, but it may also be on the top depending on the video card). Squeeze that latch with your thumb and index finger and pull away from the video card. If it doesn’t come out easily, don’t keep pulling as you could damage the cable or the video card. Your video card may have two of these connectors, so make sure to remove both of them. Also, if you have an SLI setup, you will need to disconnect the SLI bridge between the video cards. Gently pull on the bridge until it releases. Once you have the cables fully removed, it’s time to turn to the back of the case and undo the screws holding the video card in place. On the back of the GX case, you will see 2 thumb screws holding a metal plate in place over the expansion slot covers. You will need to unscrew these and remove the plate to access the screws holding the video card to the case. It may be one or two screws depending on your video card, but in either case, undo both of them and set them to the side.
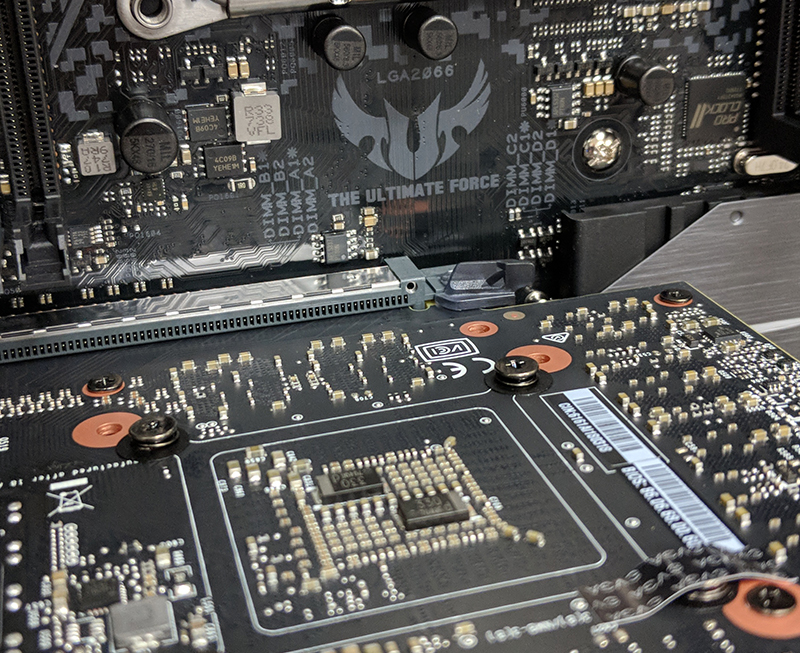
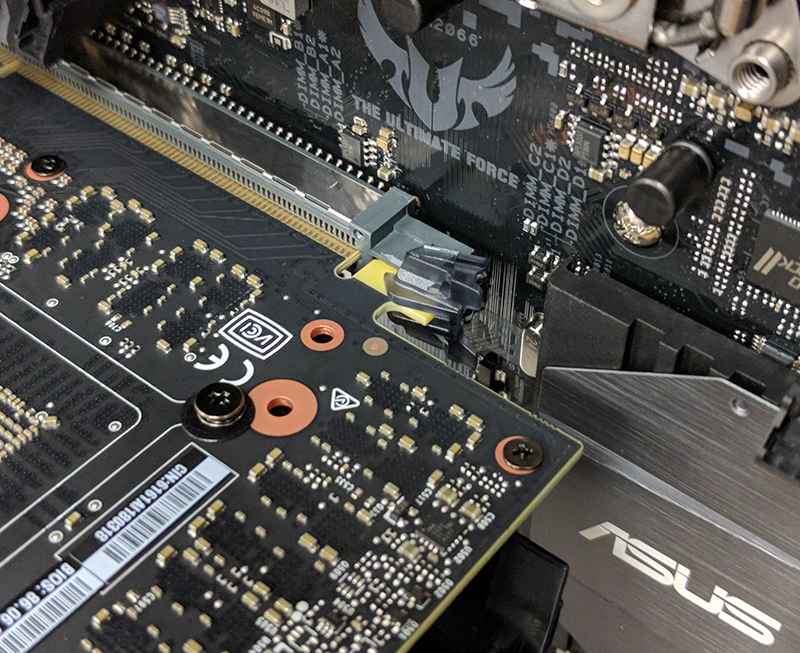
Now it is time to pull the video card out. Back on the inside of the case, the video card is seated in a PCIe slot and held in place by a retention clip, sometimes referred to as a dovetail. To remove the card, take one hand and grip the video card and with the other, use a finger to push the dovetail down towards the motherboard. It may or may not click, but once it is pressed down start pulling the video card towards you with the other hand. You may need to wiggle it side to side a little but it should come out relatively easily.
You are now able to swap in a new card or reseat your existing one for troubleshooting. The process for installing a new card is essentially all of the steps above in reverse. The only thing to note is that when inserting the new video card, make sure that the dovetail is locked and secured. It may not always audibly click when engaged, but it will move to the locked position when it is secured. Also make sure to reconnect any power cables before booting or the system will give you an error.
MX Cases
The process for removing a video card from an MX is essentially identical to the GX, with the only differences being the number of expansion slots (4 as opposed to 8), the metal plate being shorter, and 2 small screws rather than 2 thumb screws.
NX Case
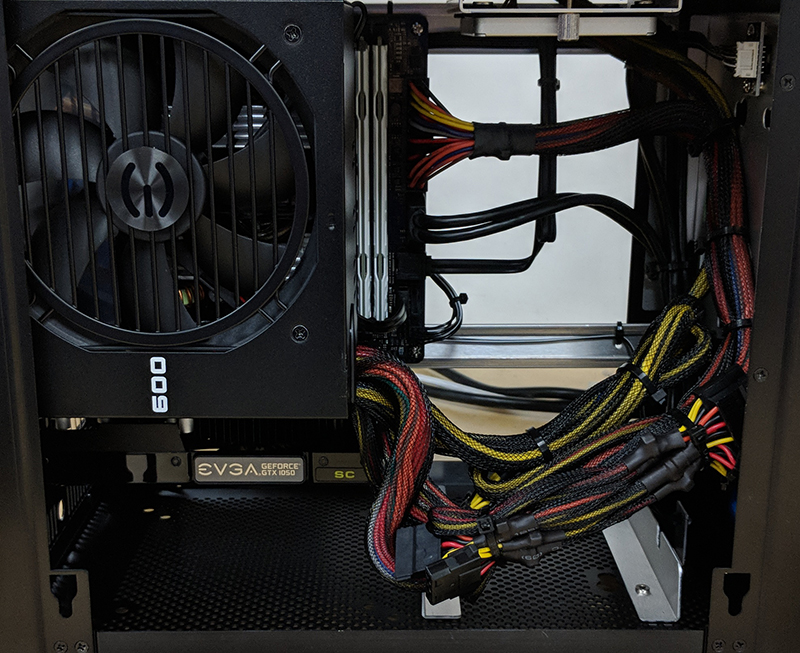
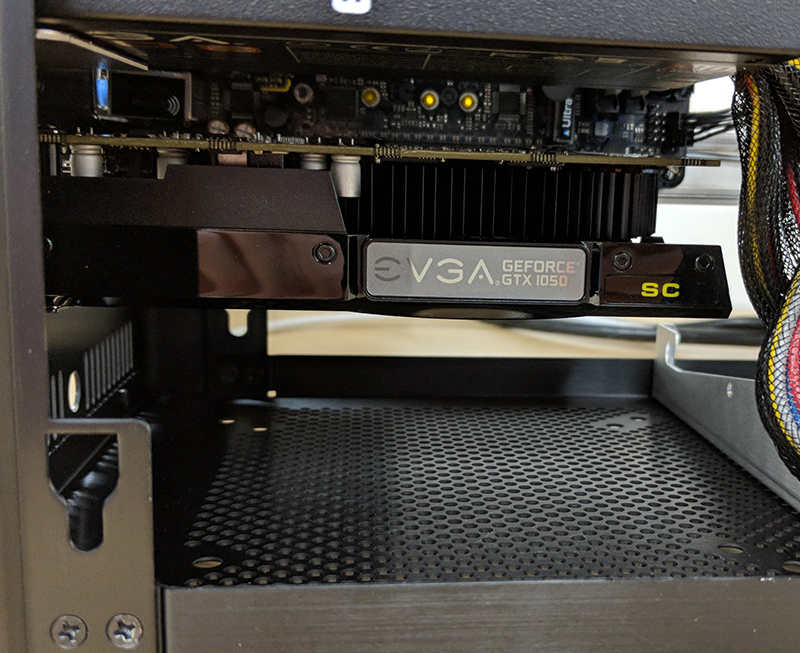
Accessing the video card can be extremely difficult due to the small size of this case. In addition to that, depending on the size of the video card and the number of drives and cables in the system it can be very difficult to add or remove a video card. Regardless, it can still be done by the end user. To start, begin by removing the side panel. The first thing you will see is the power supply, which will obstruct most of the internals. You can see the video card just below it. If your video card has any power cables connected to it, go ahead and unplug those now.
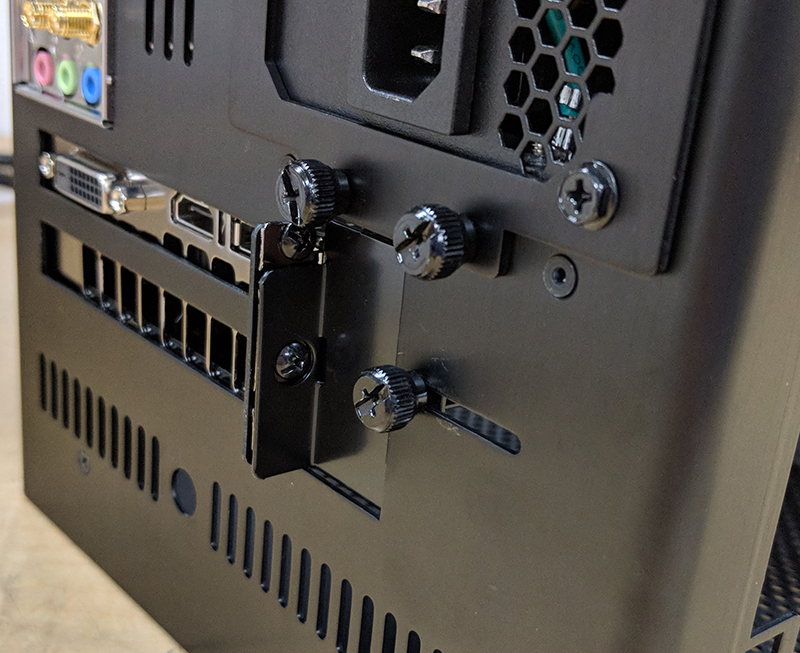
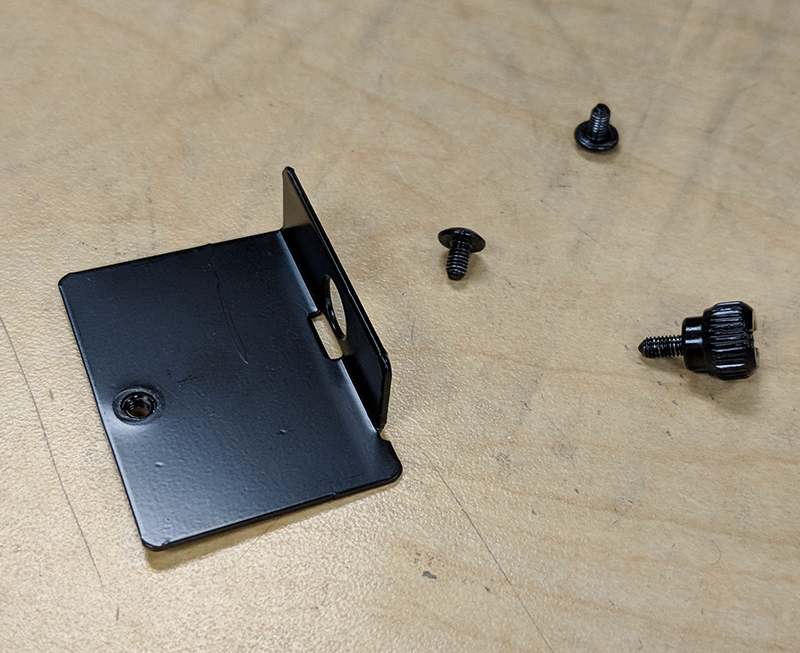
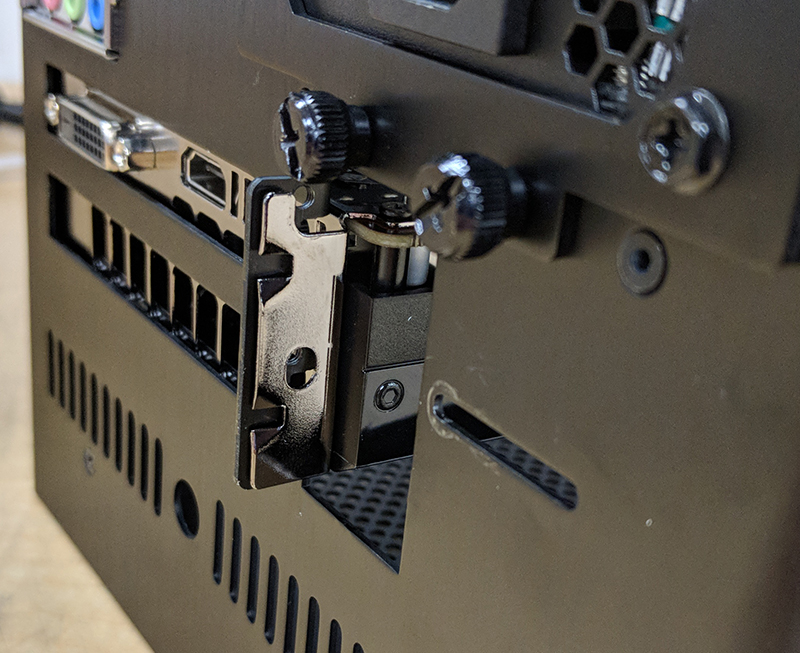
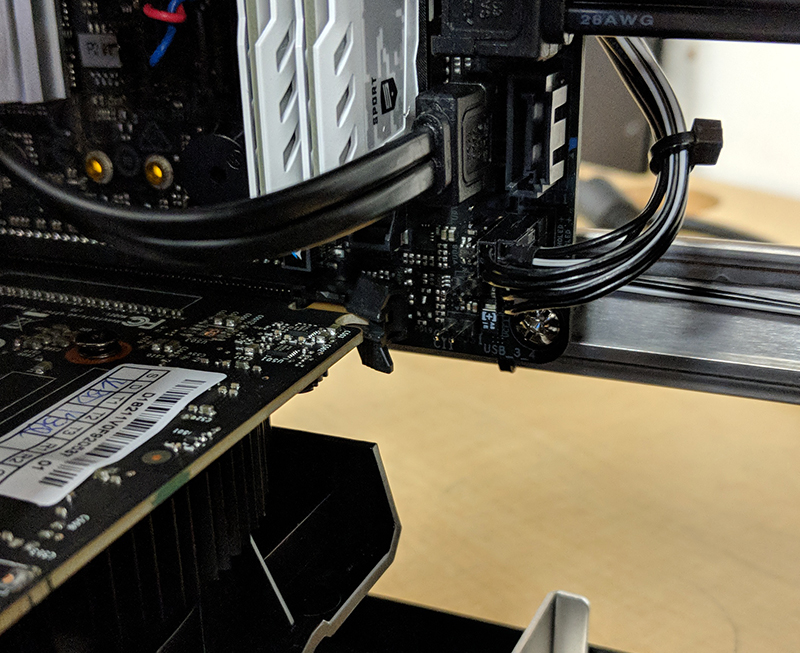
Next, turn the system to the rear and look for the single black thumbscrew towards the bottom of the case. That thumbscrew keeps the metal retention plate that covers the expansion slot covers in place. Take out the thumbscrew and the metal plate should fall out of place. Put it to the side for now. You should now see the screws holding the video card (depending on your card it may require 1 or 2 screws to undo or secure). Remove the screws and the video card should now be removable. Now, reach around the power supply and release the dovetail holding the video card. You should have just enough clearance to pull the video card out. To reinstall the video card, simply follow these directions in reverse order.
A note on what cards can fit inside of the NX case: most video cards will fit inside of the NX, even up to an RTX 3080. However, special editions of some cards that are extended length or thickness may not fit, so check the card’s dimensions before you decide to upgrade.
Small Block case
We do not recommend attempting to access any internals yourself. Accessing the video card requires the removal of the power supply and moving numerous cables. As such, we advise customers who wish to add a video card or troubleshoot anything inside a Small Block case to contact our support team for further assistance.
How to connect internal system cables
As with power cables, it may be necessary sometimes to adjust or reconnect some of the internal connections, either for troubleshooting or for adding new hardware. Some of these connections can include but are not limited to: internal USB 2.0 and USB 3.0, Front Panel Audio (sometimes called HD Audio), RGB cables, fan connectors (3 and 4 pins), front LED connectors, case speaker, and Thunderbolt connector. Plugging each of these in is fairly simple; the hardest part can be getting to them, depending on the case.
Fan Connectors
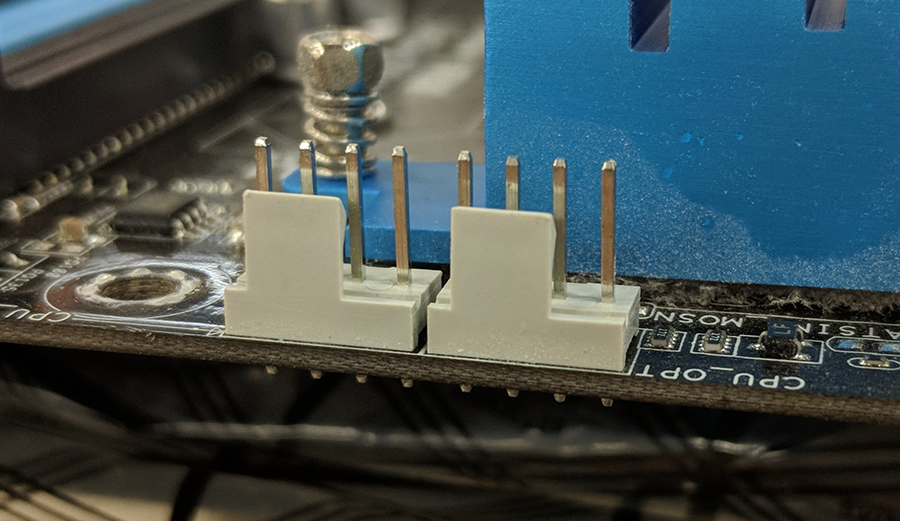
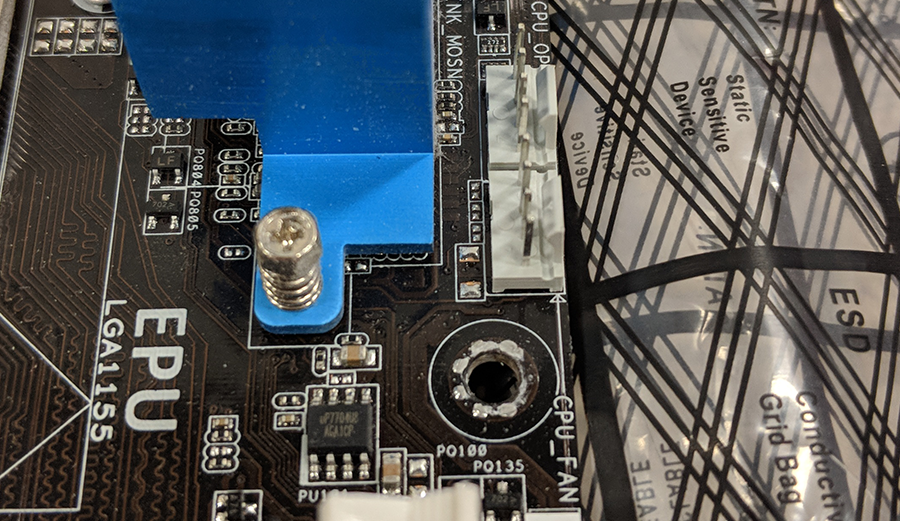
Since most fans have bearings, they do eventually go bad and start to make noise. This is especially true of top fans, since gravity adds to the stress on the bearings. If you suspect that one of your fans may be going bad, give our support team a call so they can help isolate the problem. Fan connectors come in either 3-pin or 4-pin configurations. Most motherboards will have 4 pin headers you can use with either 3 or 4-pin, although some boards do have 3-pin only headers, though this is very uncommon. When looking at the header on the board, you will see a vertical piece of plastic on one side that’s slightly off center. That tells which way to plug in the fan connector. On the fan connector, there are two ridges that will line up with the plastic guide on the header. It is possible to still plug it in incorrectly if you force it, so be careful.
A few things to note about fans before we move on. CPU cooling fans should ALWAYS be plugged into the header that is specifically labeled “CPU Fan” and not “CPU Optional” or any other header. Sometimes these headers are white, but this is not always true. The reason for this is that the CPU fan header reads temperatures directly from the CPU and scales the fan speed accordingly. On top of that, if there is nothing plugged into the CPU fan header then the system will give you a POST error each time you boot it up. Also, if you have an all in one (AIO) liquid cooler, also only plug that into the CPU fan header. Some boards will have a fan header dedicated for a water pump (labeled W_PUMP), this is intended for a dedicated water pump and not an AIO unit. The last thing to note about fans is to avoid using fan headers that are labeled “W_PUMP”, “H_AMP”, or M.2_FAN.” These are meant to power different kinds of fans than normal case fans, and using them can make your fans much louder, even after changing the fan profiles in the BIOS. Whenever possible, use fan headers labeled either “SYS_FAN” or “CHA_FAN.”
Front Panel Audio
The Front Panel Audio connector allows the onboard audio chip to use the top (or front, depending on case) headphone and microphone jack.
Note: that the NX and Small Block cases do not have these, so this guide will not apply to them.
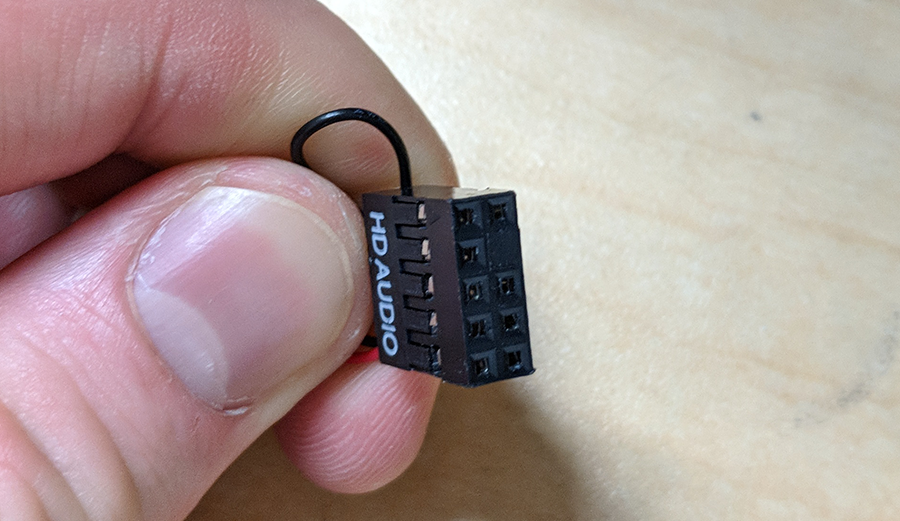
The cable for front audio is very long since the pins for it are usually in the very bottom left corner of the motherboard. The pins themselves are arranged in two rows, one on top of the other, and may be labeled either “AAFP” or “HD Audio.” On most boards, the bottom row has 5 pins and the top row has 4 with a gap between them. Some boards may reverse this, so always double check to confirm this. Now, if you look at the Front Audio connector, you will see holes that line up perfectly with these pins. Pay close attention to the one pin hole that is filled in; that one needs to line up with the empty spot in the pins. Once you’ve determined the proper way to plug it in, press the connector carefully into the pins. Make sure to not bend or angle it too much as the pins can be bent fairly easily.
Internal USB cables
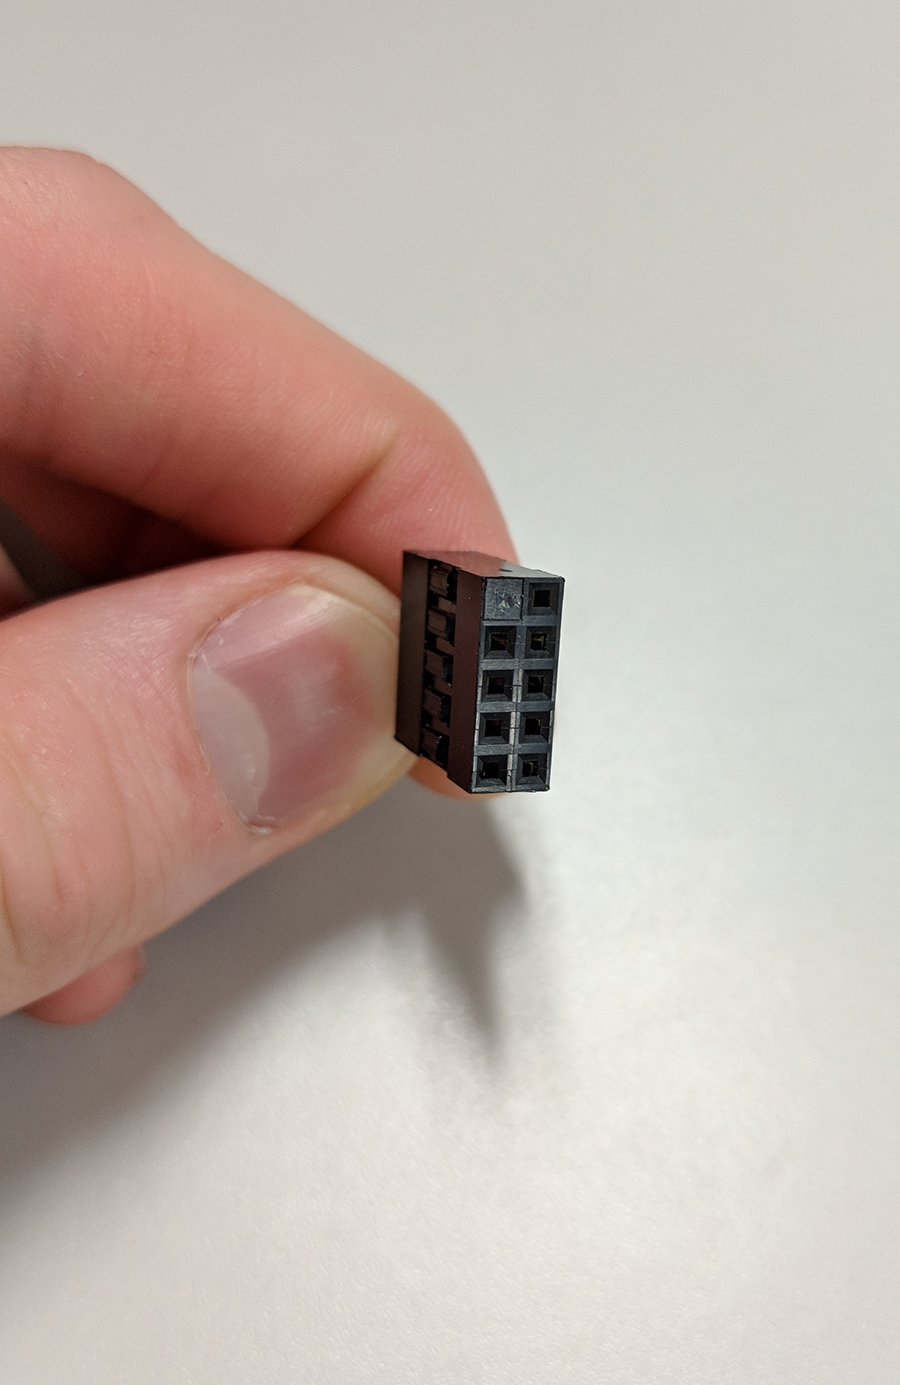
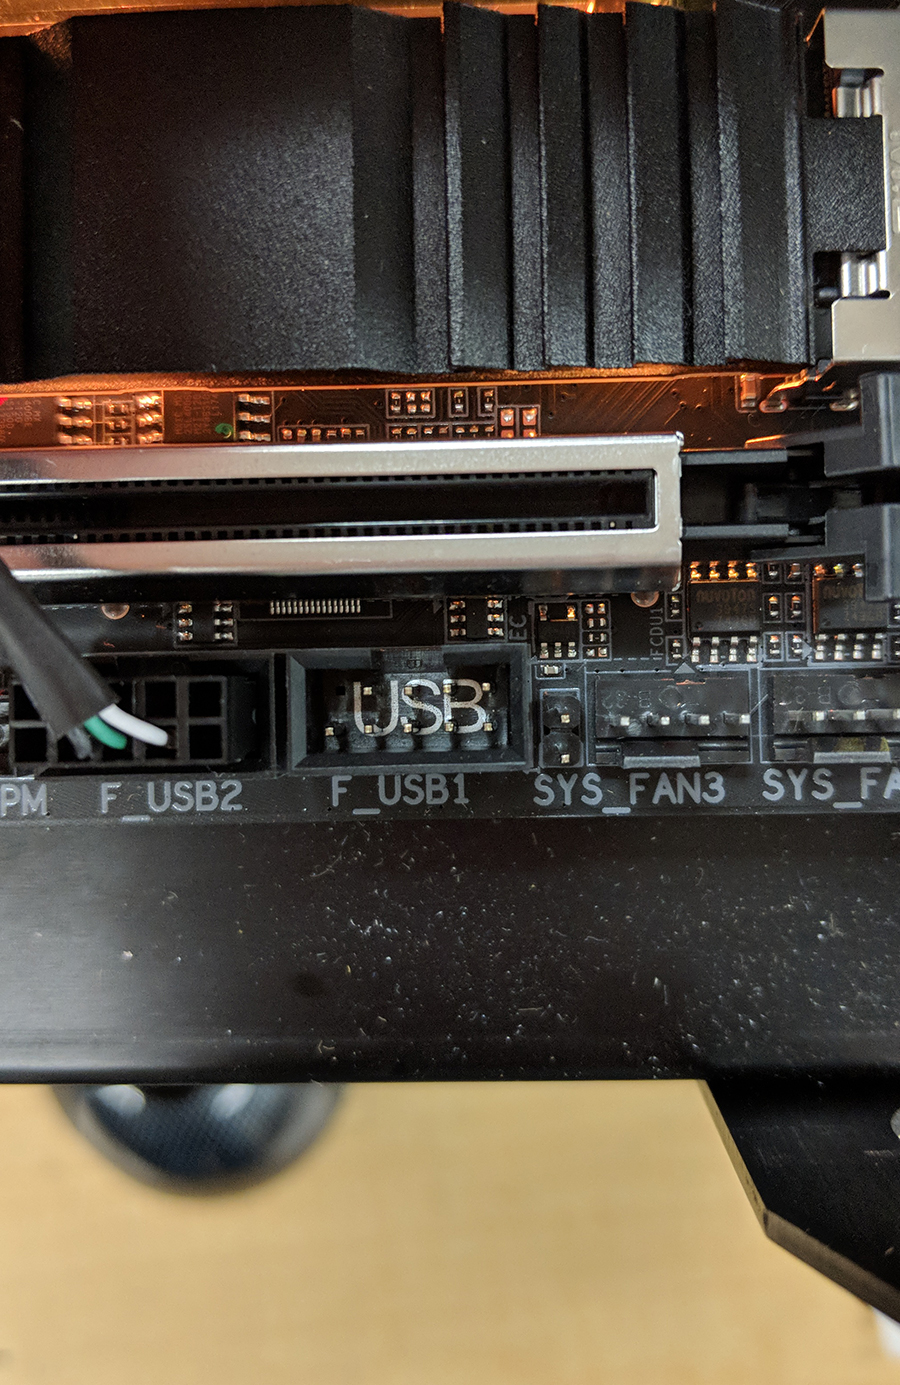
Even though they are identical in terms of speed and performance, internal USB cables connect in very different ways. USB 2.0 internal connections use either a 9-pin connector or a 5-pin connector directly to the motherboard. Why two different types for USB 2.0? It depends on the device, but if a device uses a 9-pin connector it’s because it needs the additional bandwidth provided by the extra 4 pins. The 9-pin connector is arranged in two rows, one on top of the other with the last pin one row being empty on the board and on the connector. These need to line up when plugging in. The 5-pin standard is less common these days but may still be used for some devices. If you have an older Velocity Micro system with an older case design (GX2, MX2, LXE, etc.), the multi-card reader uses this type of connector. The 5-pin connection is a single row of pins rather than two and has the added benefit of being able to connect two of these into 1 USB header. One thing to note when plugging these in is that the red colored cable should be on the side opposite of the empty spot (this spot is sometimes referred to as the “dead pin”). Most boards have at least two USB 2.0 headers, whereas some have only one or as many as three or more. Check your motherboard’s manual if you are unsure of how many you have or where they are.
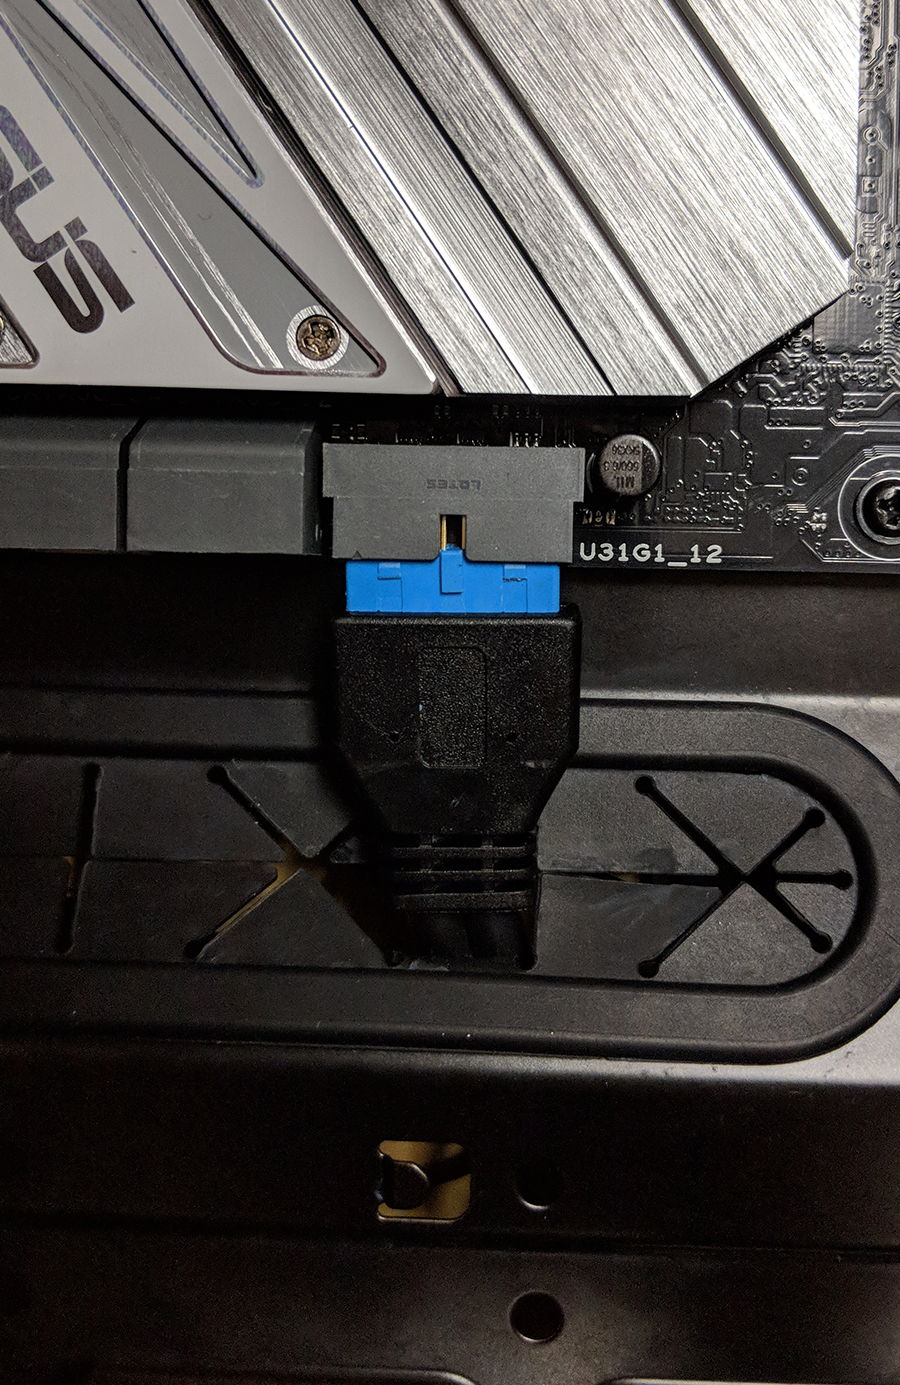
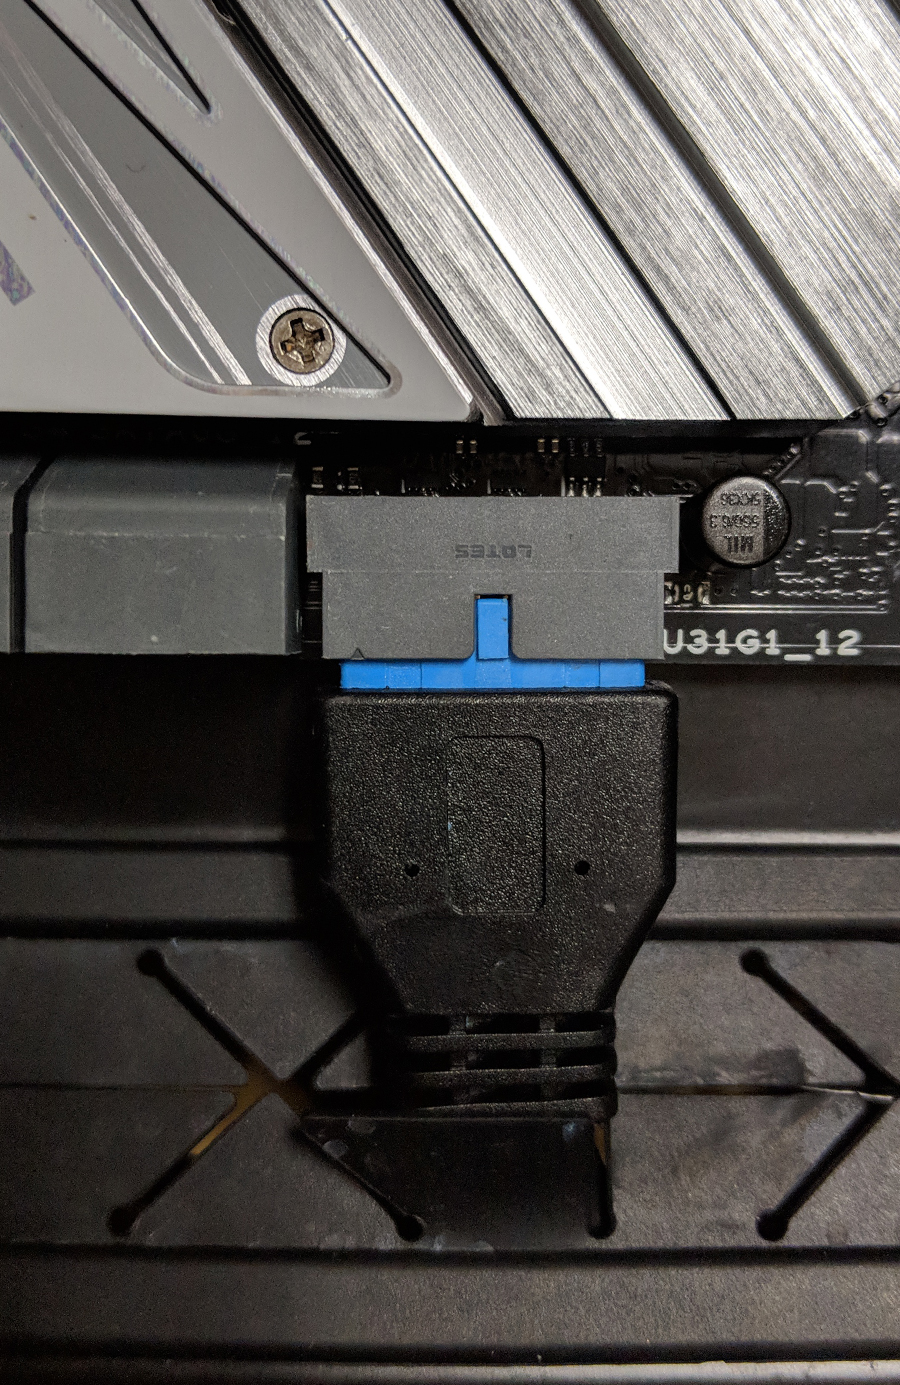
Next is USB 3. USB 3 internal cables are more straightforward, with only a single type and easily plugged in. They are easier to spot since they are larger, but different manufacturers put them in different places. The most common places are along the right edge of the board (usually between the ATX 24-pin and the SATA ports) or along the bottom edge of the board (next to or near the USB 2.0 headers). It’s also worth pointing out the two different ways they can be connected. The older and more traditional way was to have the pins sticking out vertically from the board, essentially the same as any other header on the board. But newer boards have one or both headers with the pins pointing outwards from the board. For example, if the USB 3 header is on the right edge of the board, then the header will be facing to the right. In either case, if you look at the connector on the board you will see a rectangular cutout in the plastic. This lines up with a notch on the connector to help you plug it in correctly. Make sure you line up the notch and cutout correctly, as it’s possible to bend the pins in the header.
RGB headers and cables
This can be a little confusing, since different manufacturers implement the RGB standard in their own way. The default pin arrangement for a header is 4 pins, one for Red, Green, and Blue respectively, plus one for 12V power. However, a manufacturer like Asus, for example, has their layout as Green, Blue, and Red. This won’t matter much if you are using RGB accessories from one manufacturer, but it can get confusing when you try to mix and match different manufacturers. Unless you are adding more RGB accessories to your Velocity Micro system, you shouldn’t need to worry about this.
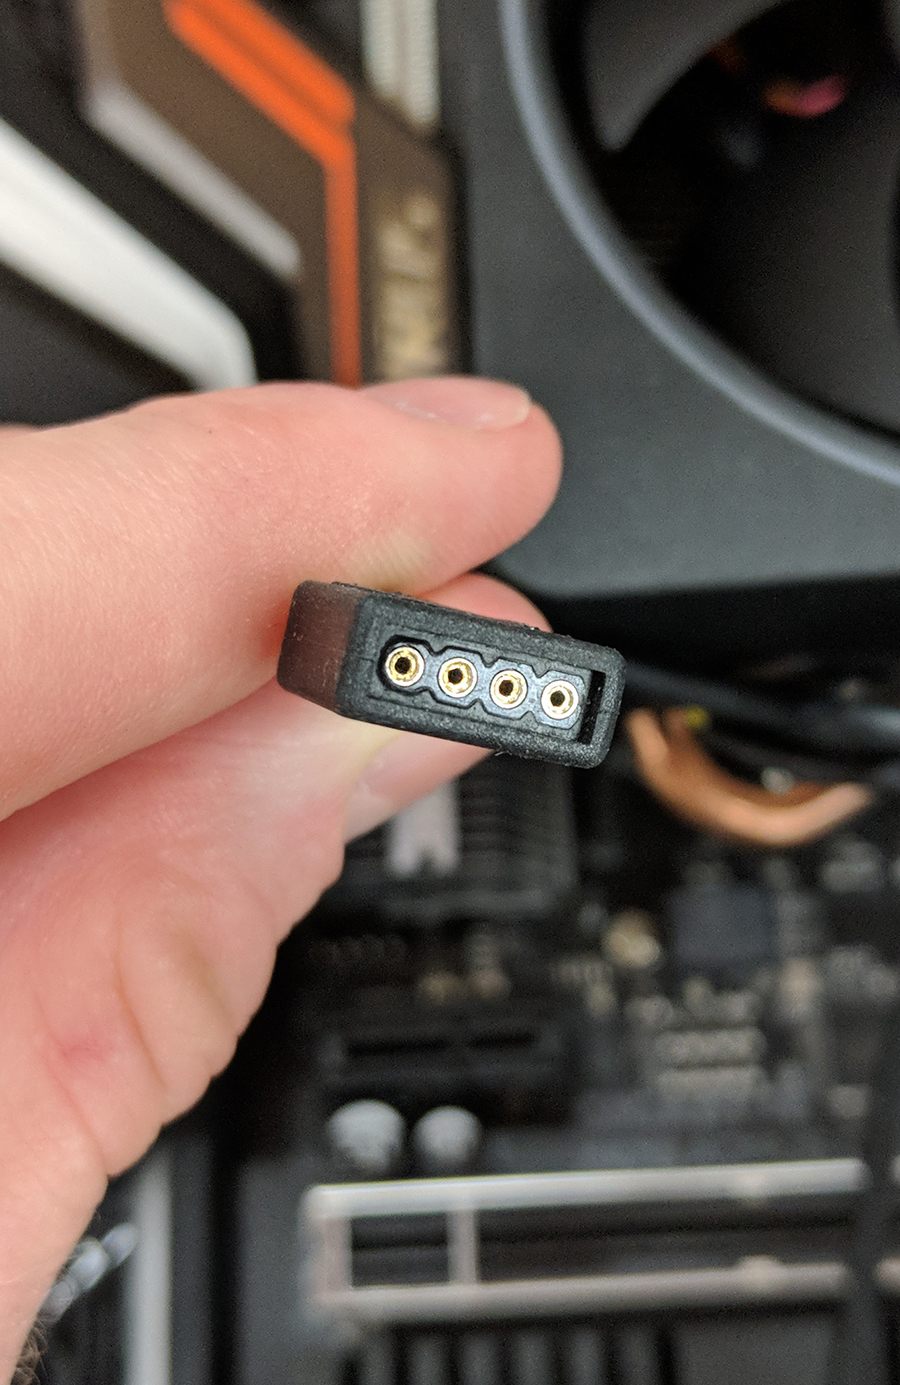
You are most likely to need this guide if you have an AMD Ryzen-based computer with stock cooler from Velocity Micro. AMD’s Wraith cooler has an RGB ring around the fan, which can be controlled through the RGB connection. As with USB connections described earlier, there can as few as one or as many as three or four on a single board. For the most part, these RGB headers are white, but this is not always true, so check your motherboard’s manual if you aren’t sure. They are most commonly placed along the bottom edge of the board, along the top right edge, or above the top PCIe slot. Fortunately, RGB cables are fairly easy to connect, with just a 4-pin header on the board. There is one thing to keep in mind, however. On the RGB connector cable, there will be an arrow on both sides that will correspond to a certain pin on the header, called “Pin 1”. Unfortunately, most manufacturers don’t label this very well on the board, so you will probably need to check the motherboard’s manual for help. It is important that you correctly plug it into pin 1, or your RBG accessories will not synchronize with each other.
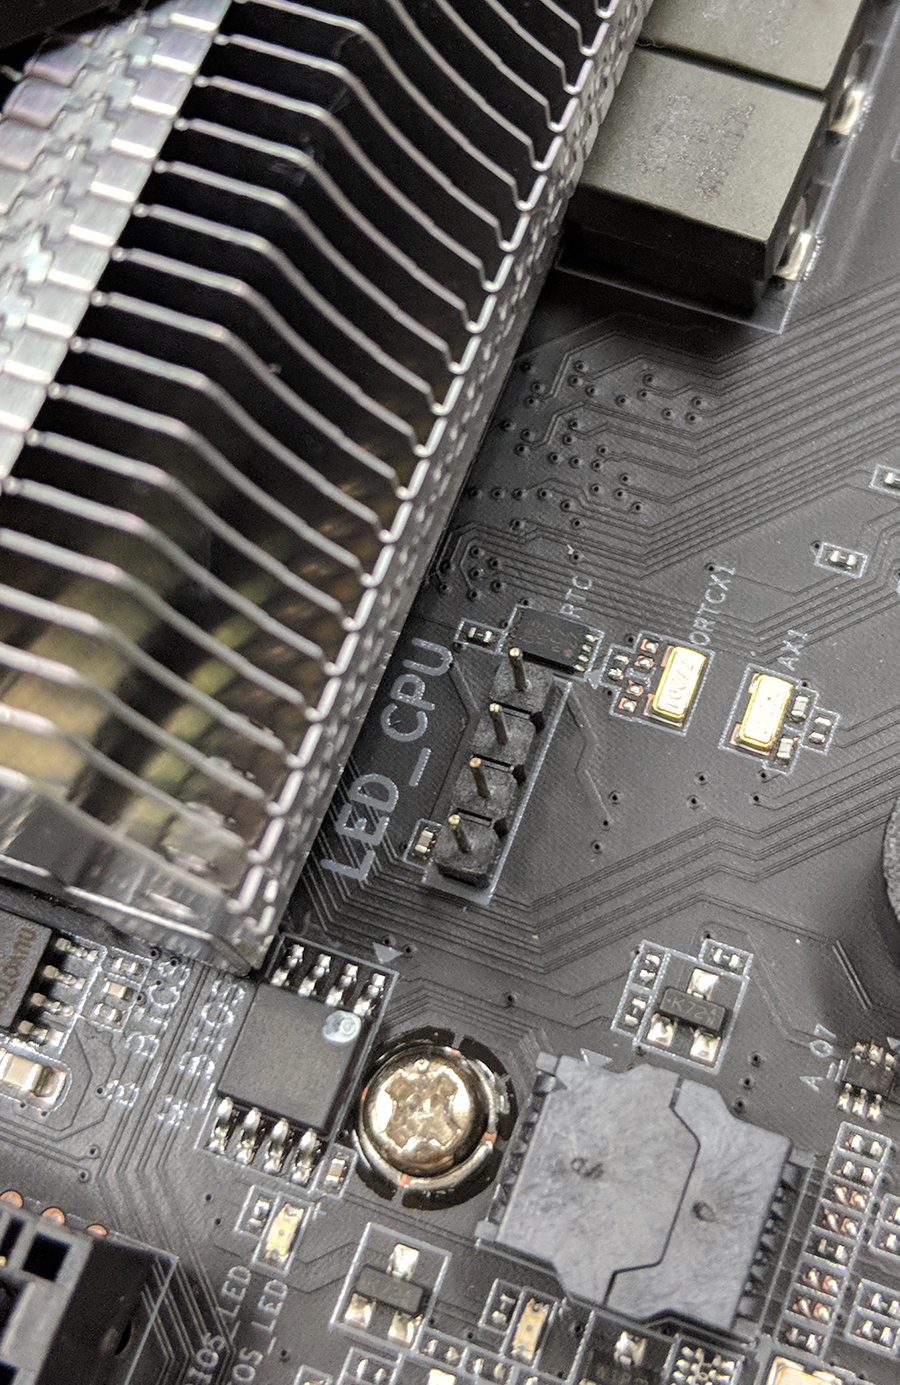
Front LED and power cables
These can be difficult mainly because the connectors and headers are very small and may be difficult to reach. The standard arrangement of front power connectors includes an HDD LED, Power LED (on separate positive and negative connectors and pins), a Power Switch connector, and a case speaker connector. Some cases may have an additional connector for a reset button (common on older Velocity Micro cases) or lack the HDD LED (also on older Velocity Micro systems as well as the VX case). As a general rule, the front panel header is almost always in the bottom right corner of the motherboard below the SATA connectors, but there are exceptions. Another general rule is the layout of the header itself, which is usually two rows of pins. Most manufacturers adhere to the same standard of, in order of left to right: HDD LED in the first two pins on the bottom row, Power LED positive in the first pin on the top row, Power LED negative in the pin immediately next to that, Power Switch immediately next to Power LED negative, and Reset Switch immediately below Power Switch. The case speaker connector will take four pins on the top row all the way to the right. One thing to note about the case speaker is to watch out for is the number of pins on the top row. If there are only four pins, then you can simply plug the case speaker into those and move on. But if there are five pins, you need to leave the last one on the right unused by the case speaker. That last pin is for Chassis Intrusion Detection (CID), but Velocity Micro cases do not use this feature. As stated earlier, there are exceptions to this layout. Some boards have a gap between Power LED positive and negative, for example. If you are unsure of what your layout is, you can always check the motherboard’s manual.
Thunderbolt card
Thunderbolt cables have a 5-pin connector on one end and a 9-pin on the other. The 5-pin part goes into the motherboard in a distinctly shaped connector. The 5-pin part also has a plastic latch that holds it in place. You will need to release this latch to unplug it from the board if required. The other end of the cable is the 9-pin. It looks similar to an internal USB or front panel audio; however, the dead pin is in a different position. Make sure to line it up correctly or you will risk bending the pins. Just like RGB connectors, Thunderbolt is fairly straightforward.
How to install an additional storage drive
Installing an additional hard drive is a fairly straightforward process and can be done in a relatively short amount of time. The only tools you will need are a Philips head screwdriver and a pair of wire snips. You will also need a SATA data cable and a SATA power cable (sometimes called a SATA chain because there are multiple connectors on each cable). Most SATA chains have at least three connectors while some have four. Depending on the power supply in your system, there may be additional SATA power cables in your accessory bag that came with your system. This means your power supply is modular or semi-modular. If there are none, then your power supply is non-modular and all SATA power cables are already in the system. You still may be able to add more hard drives, but you will be limited by the number of SATA power connectors that are unused and the length of the cables, as well as by the fact that these cables are zip tied down in numerous points in the case. If at any point you feel uncomfortable, please give our support team a call for assistance.
For each case you will need to remove the side panels. If you are unsure how to remove them, please check our guide on how to remove side panels.
This guide will be broken into three sections. 1) how to add rubber grommets and mounts to your drives to prep for installation, 2) how to physically install a hard drive in your system, and 3) what to do in Windows to make your drive usable.
1. How to add rubber grommets and mounts to your drives to prep for installation
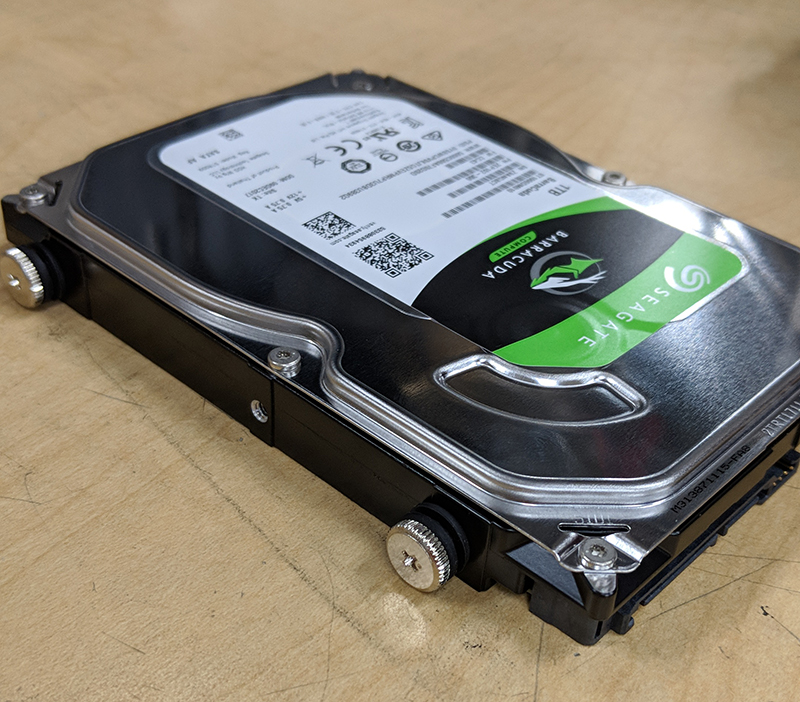
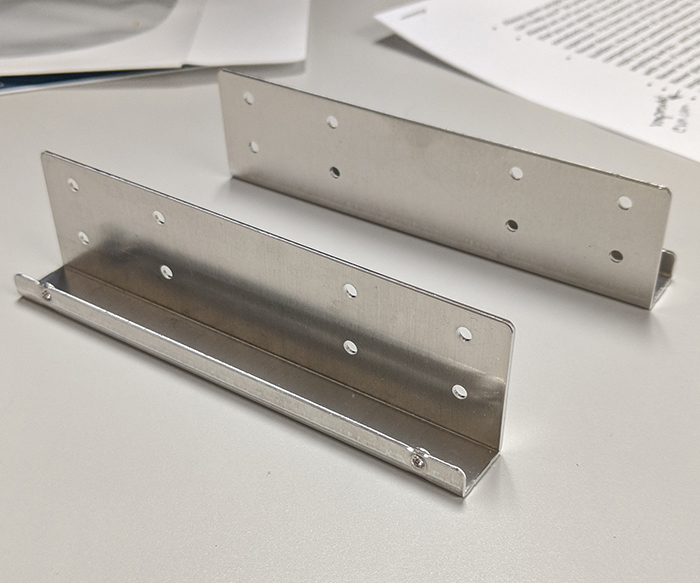
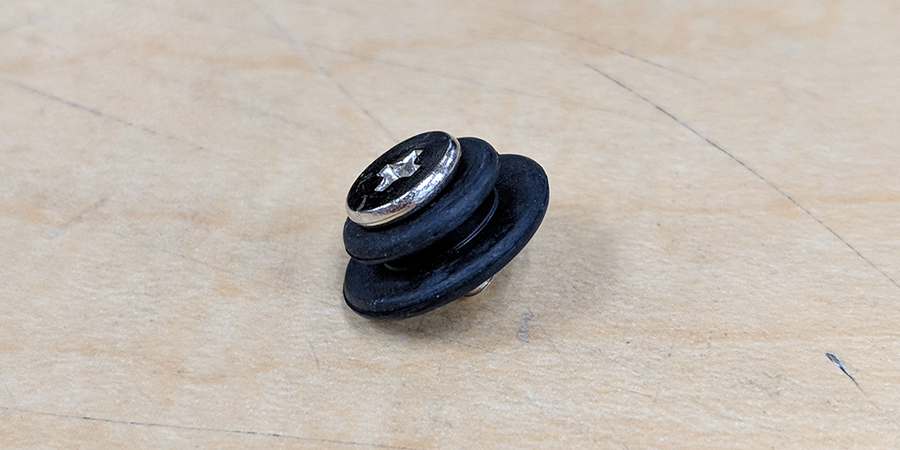
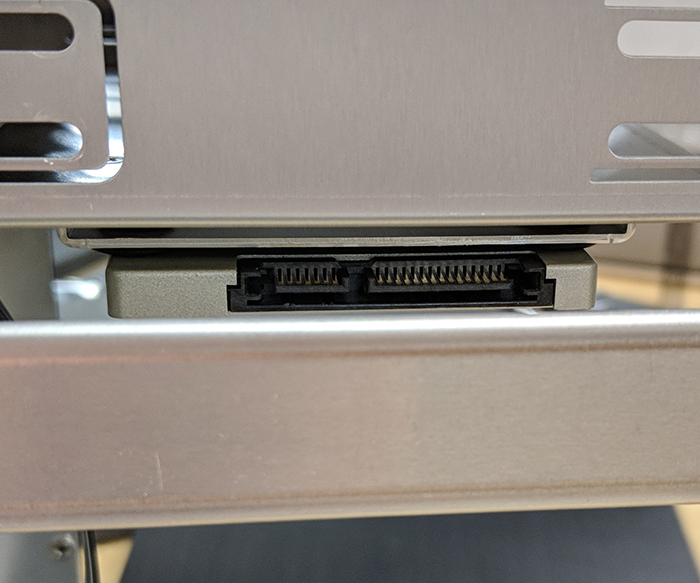
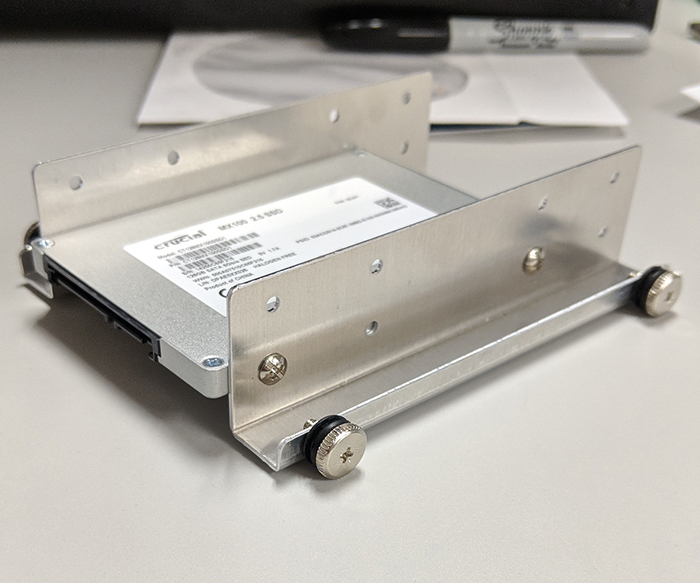
Each Velocity Micro system comes with a small bundle of screws and grommets needed to add additional drives your system. One thing to note is that if your system was purchased with an SSD (Solid State Drive) then there will already be metal 3.5” adapters in your system. If your system does not already have an SSD, then these will be in the same bag as the screws and grommets. Start by opening the accessory bag and finding four silver thumb screws and four black rubber grommets. If you are adding an SSD, then you will need the metal brackets and four small silver screws in addition to these. For a regular 3.5” mechanical drive, you will need to fit each thumb screw with a rubber grommet. Most hard drives have six screw holes lining the edges of the drive. You will need to insert screws into the outer two on each side, not the middle ones. See the picture for an example. SSD’s need to be mounted a little differently. Each of the metal brackets has eight screw holes separated into two rows. You will want to use the lower row to mount the SSD (you can use a single pair of brackets to mount two SSD’s if you need to). See the example picture for a better idea. Repeat for both sides and then install the thumb screws and grommets the same way you would for a hard drive. Now it’s time to insert the drive into the cage.
2. How to physically install a new hard drive
VX Case
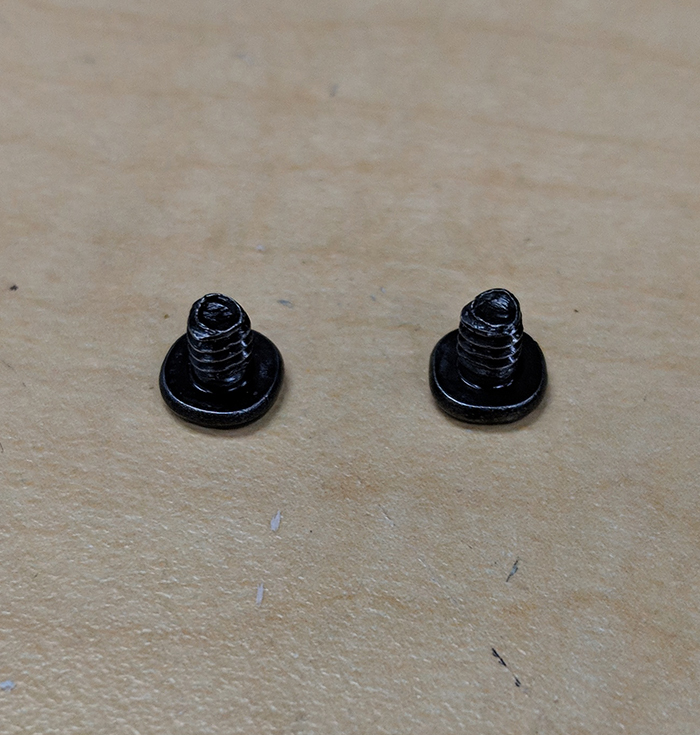
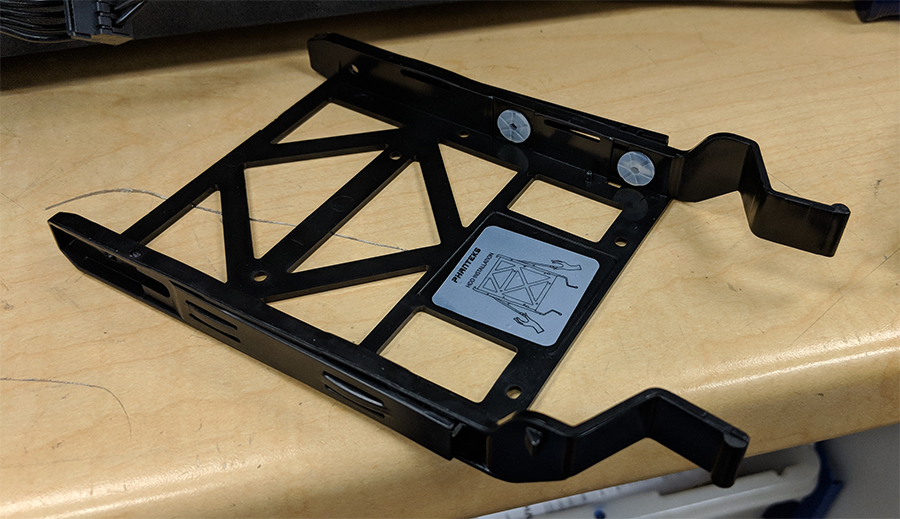
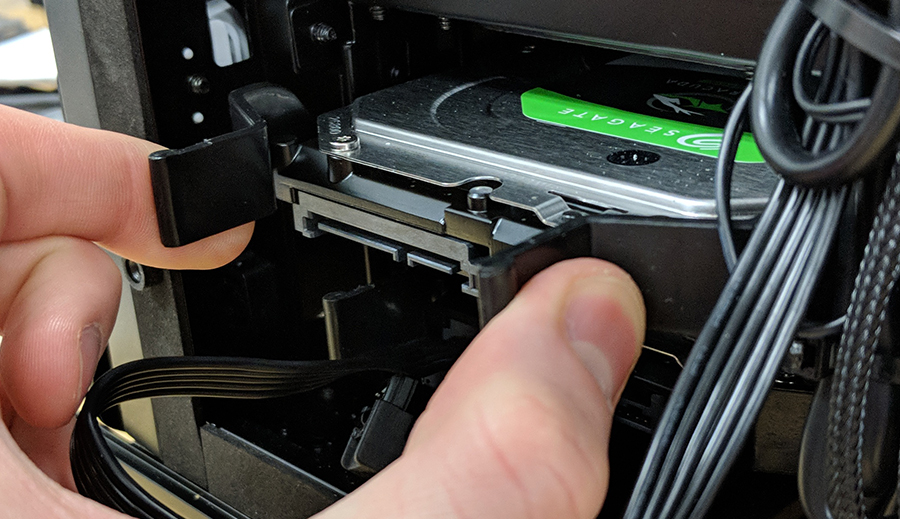
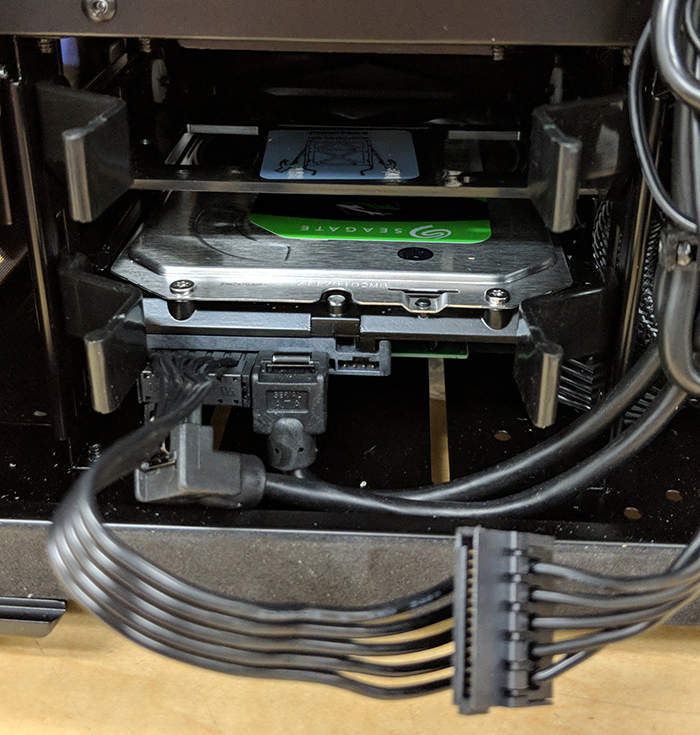
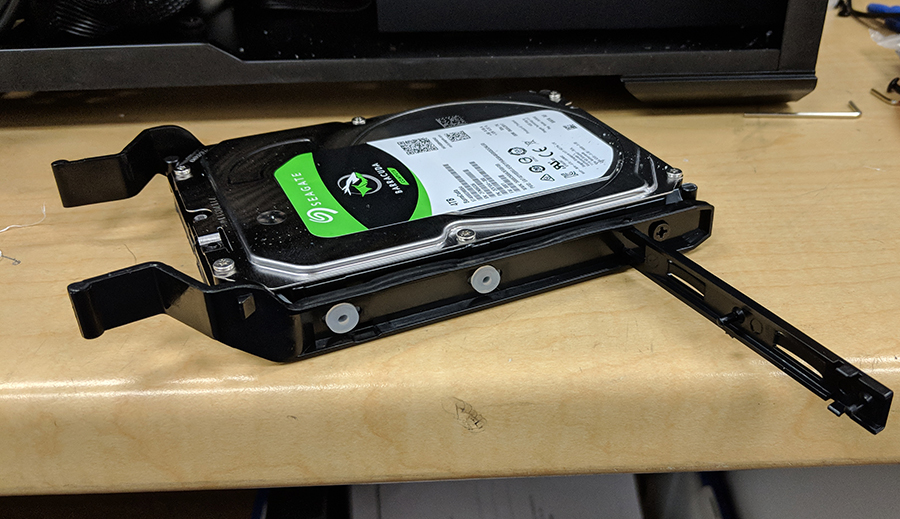
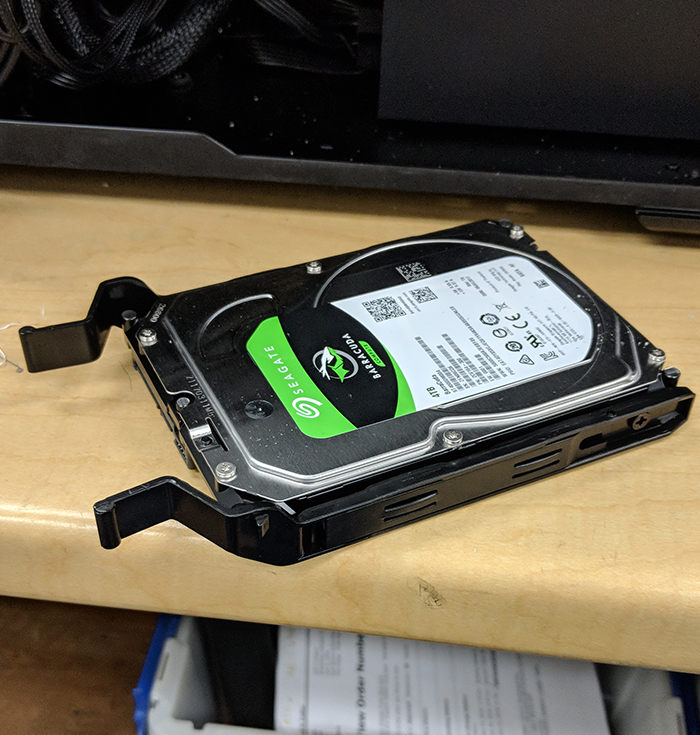
The VX and VXm have a spot in the bottom front of the case for two 3.5” drives, which are held in removable trays. Start by removing both side panels and turning the case around so the back of the motherboard is facing you. If you look in the bottom left of the case, you see two drive trays that can slide out towards you. Each of the trays has a locking mechanism on either side that swings out on a hinge. Each arm has two pegs that align with the screw holes on the hard drive.
NOTE: If you have a high capacity drive such as an 8 TB or higher, the screw holes may not line up properly. The tray is a tool-less design and does not need any screws to secure; simply push the arms back in place until they click and slide the tray back into the case.
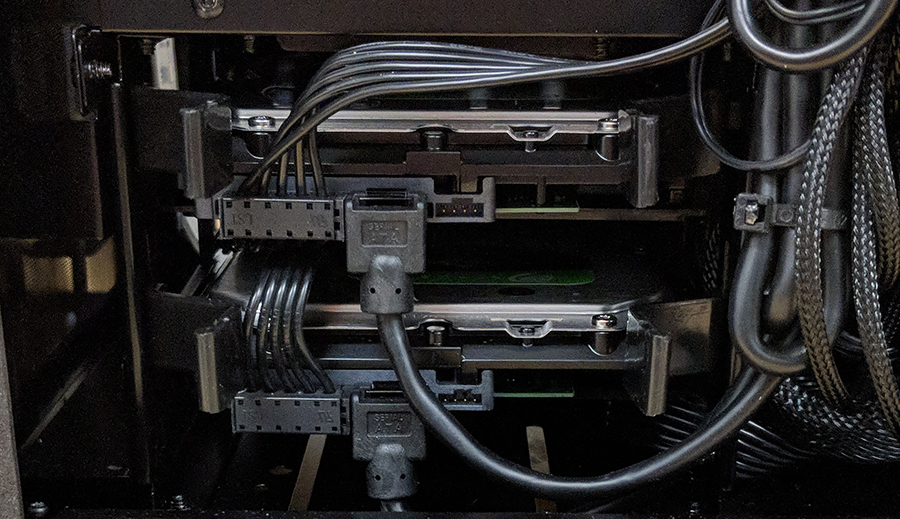
Now add the SATA cables. If you have one of our VX cases, then chances are you also have a modular power supply. Unfortunately, the power supply in a VX case is contained in a basement below the rest of the internals. It can’t be accessed from the front, so you will need to unscrew the power supply and slide it out partially to access the SATA plug. There are four black Philips head screws on the back holding the power supply in place. Once they’re removed you can push gently on the power supply to slide it out of place and pull it partially of the case. Be aware that there are a lot of cables running from it and some of them may be tight, so be careful to not put too much pressure on anything. If you need to, unplug some of the connections to make it easier to work with, but just remember to plug them back in once you’re done. If you are able to safely pull out the power supply and find the SATA connection, go ahead and connect the SATA power cable to the power supply. At this point, you can slide the power supply back in place and secure it with the screws you took out earlier. Make sure to tuck the loose cables back in the basement to keep them out of the way. Now you need to run the SATA cable to your hard drive. It’s important to note that both the SATA data and SATA power cables have a correct orientation for being plugged in. If you look at each cable, you will see that both have an opening in the shape of a sideways “L.” Drives also have this shape on their connectors. Make sure to line them up properly or you risk damaging the connectors. Next, you need to connect the SATA data cable to your drive. SATA cables come in two varieties - straight connector and 90° connector. Either one will work in most cases, but there are some instances where you may want to use one rather than the other. In any case, connect one end to an open SATA port on your motherboard and the other in your hard drive. Unlike the SATA power connector, most SATA data connectors have a metal latch that clicks when secured. Make sure that the latch is engaged. Once you’ve connected both cables, it’s time to close up the case. If you have any zip ties of your own, you can use them to clean up the wiring and make everything look a little neater. It’s not strictly necessary, but it just looks better.
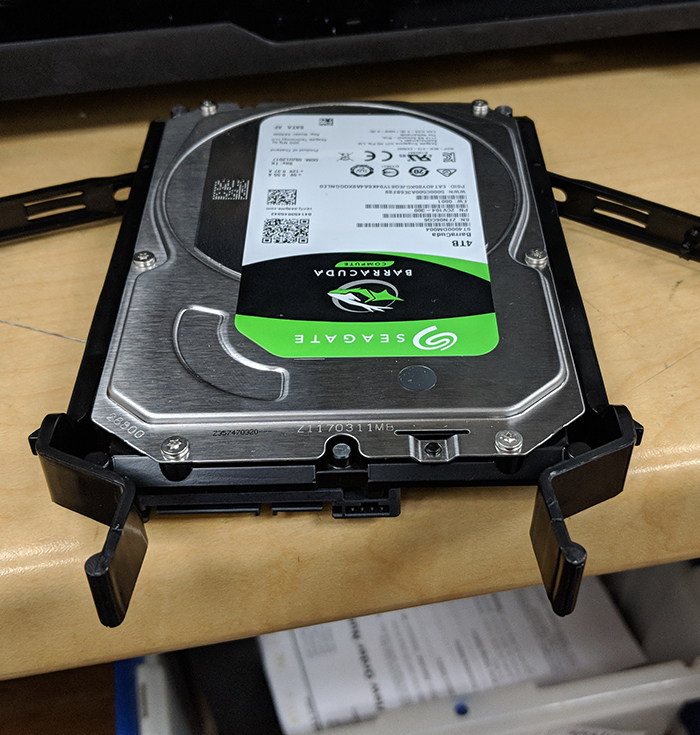
GX4/5, MX3/4 Cases
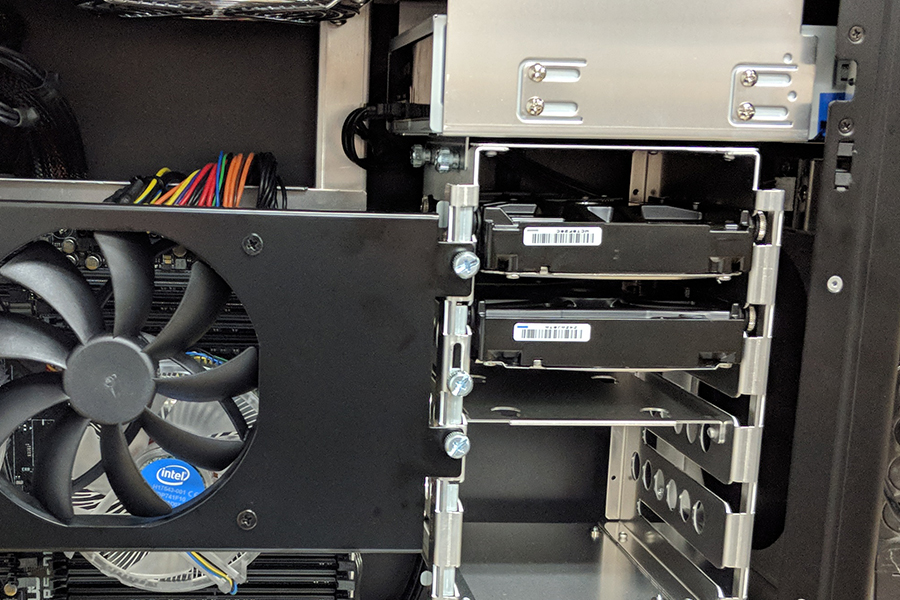
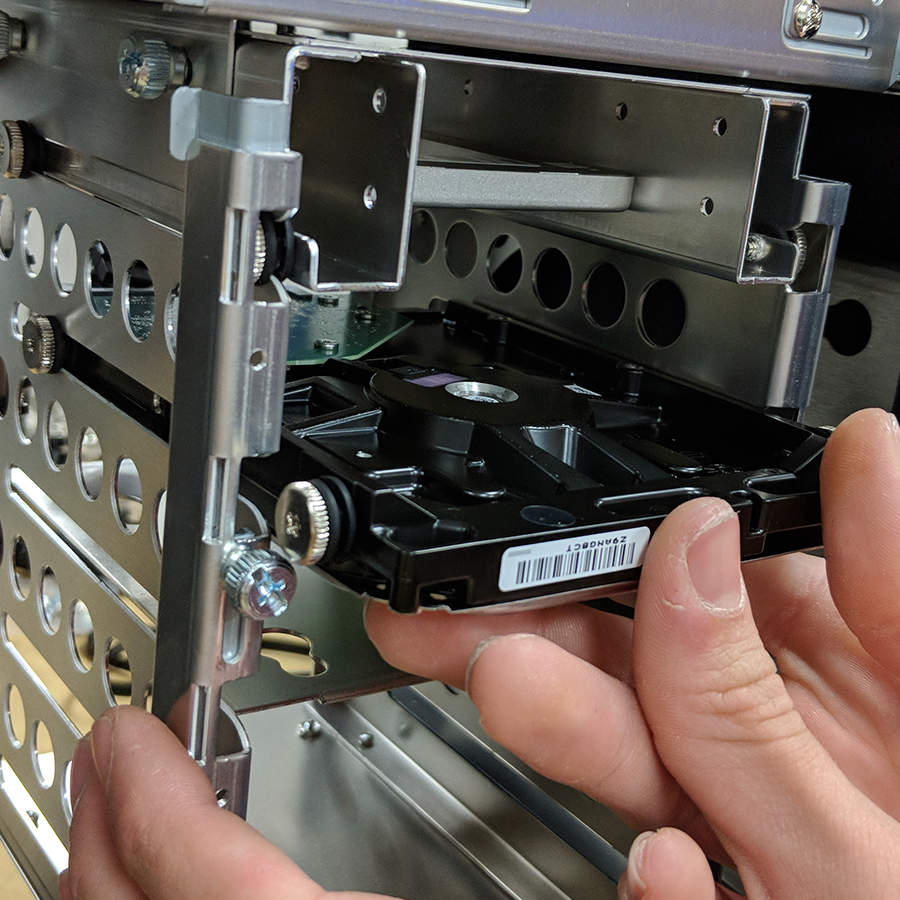
The GX4/5 and MX3/4 cases use the exact same drive cage, so the process for adding a drive is the same for both. Both cases can support up to five 3.5” drives. Begin by removing both side panels. Turn the case so that you are looking directly at the motherboard. In front of you will be the door that holds the two optional side fans, and on the right side of the door should be three thumb screws arranged vertically. The middle one is used for the retention bar that holds the hard drives in place. Use a Philips head screwdriver to partially unscrew it. Don’t completely unscrew it as that will cause the retention bar to fall out, but just enough so that you can slide it up and down. With the bar slid up, insert your drive into the cage so that the SATA ports are facing away from you. Once you’ve fully inserted all of the drives you plan to add, go ahead and let the retention bar fall back into place and tighten the thumb screw with a screwdriver. Once it’s secured turn the case around to access the back. If your power supply is modular, then go ahead and connect the SATA power cable to the power supply and then plug in the other end to your drive. Now go ahead and connect the SATA data cable to your motherboard and then to the drive. Safely tuck away any cable slack that you can and put the side panels back on. Again, zip ties are great for cable management, but not required.
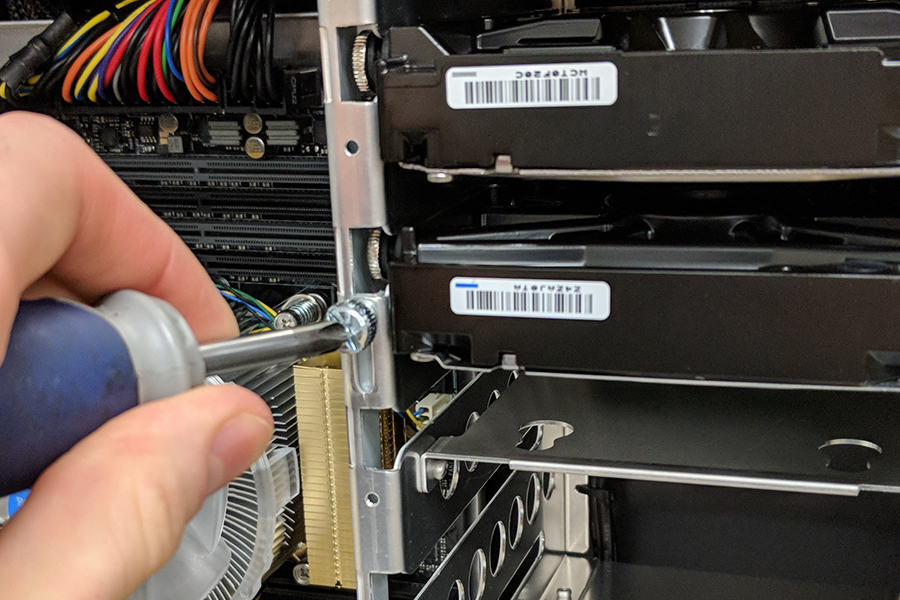
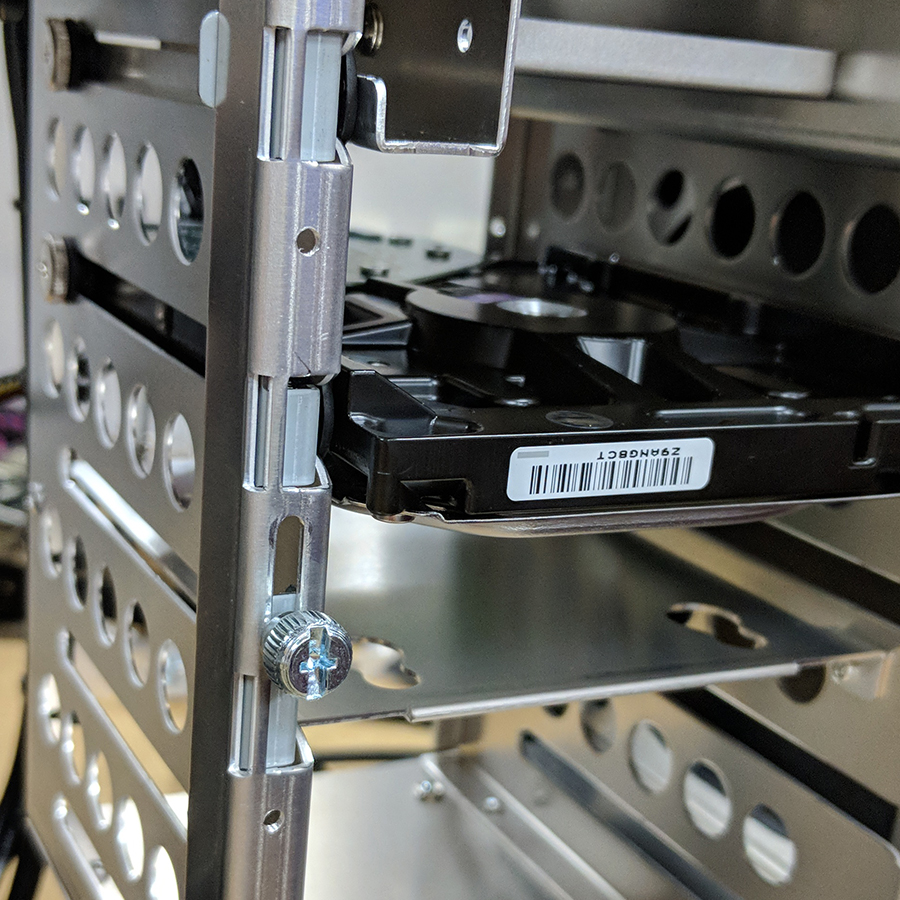
GX6 and MX5 Cases
To improve air flow and allow for larger AIO coolers, we have removed the large hard drive rack from the GX6 and MX5 cases. Additional hard drives may be mounted in the small rack in the bottom right corner or behind the motherboard. Access these additional brackets by removing that side panel.
NX case
The NX can support up to three total drives, either two SSD’s and one 3.5” mechanical or one SSD and two 3.5” mechanical drives. However, as stated in our guide for replacing video cards, the NX is a small case, and it can be fairly difficult to add or remove anything. If at any point you feel uncomfortable or are unsure of how to proceed, please call our support team. If you plan on adding a 3.5” hard drive, then the procedure is exactly the same as the GX4 and MX3. Four silver thumb screws and four rubber grommets in the outer screw holes of each corner. The procedure for adding an SSD is a little different, however. The accessory bag that comes with an NX includes some smaller screws that are roughly the same shape as the larger thumb screws. You will need four of these as well as four rubber grommets. Put the grommets on the screws, but instead of putting the screws on the side of the SSD, they need to go in the bottom of the SSD. There are four holes for four screws on the bottom of an SSD. Depending on your original configuration from Velocity Micro, the number of available spots for additional drives may vary. Both an SSD and a mechanical drive can be installed vertically in the front of the case, however only a mechanical drive can be installed in the bottom spot and only an SSD can be installed in the top slot.
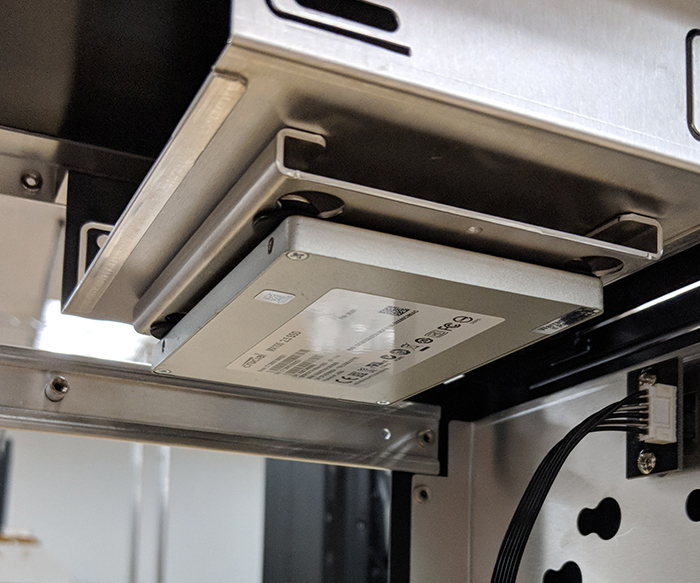
We’ll start with adding an SSD to the top slot since it’s fairly straightforward. Underneath the bay for the optical drive you will see there are four cutouts. Take the SSD and flip it over so it’s upside down with the SATA connectors are facing the back of the case. Now align the grommets with the cutouts below the optical bay and press it flat against the bottom of the optical bay and sliding it towards the back of the case at the same time. You should be able to feel the grommets move into place. Now your SSD is securely installed but still needs to be connected to power and data. Attach SATA power and data cables as needed and you should be good to go.
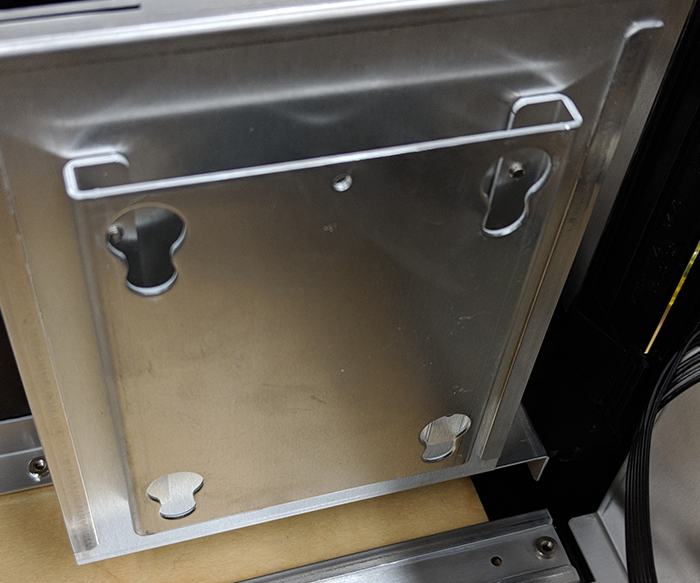
As stated earlier, you can install a hard drive in either the bottom bay or on the front below the optical drive. The bottom bay is recommended over the front, partly because it is easier to install and partly because it is more secure if the case is being moved around. To add a drive to the bottom bay, first install the silver thumb screws and rubber grommets to the drive and tighten them down with a screwdriver. Next, in the bottom of the NX there are metal brackets attached to the bottom of the case. Each bracket has grooves cut out of it that you will need to align the rubber grommets with. Take the back end of the hard drive (the side without the SATA connections), align it with the two cut outs in the back of the metal brackets and then align the front two grommets with the front two cut outs and press down until it slides into place. A fully installed drive should completely flat and level with the bottom of the case. Now you can connect the SATA power and data cables and close up the case.
We do not recommend attempting to work on our Small Block case. If you need to perform any troubleshooting or upgrades, please call our support team.
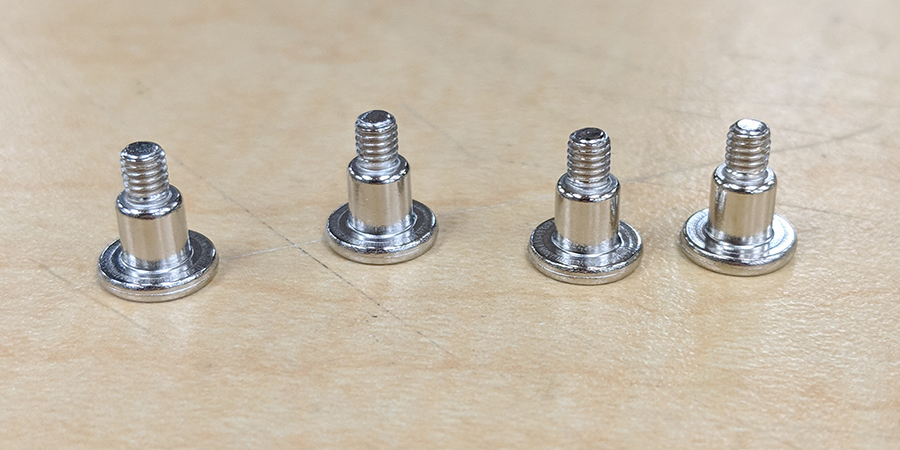
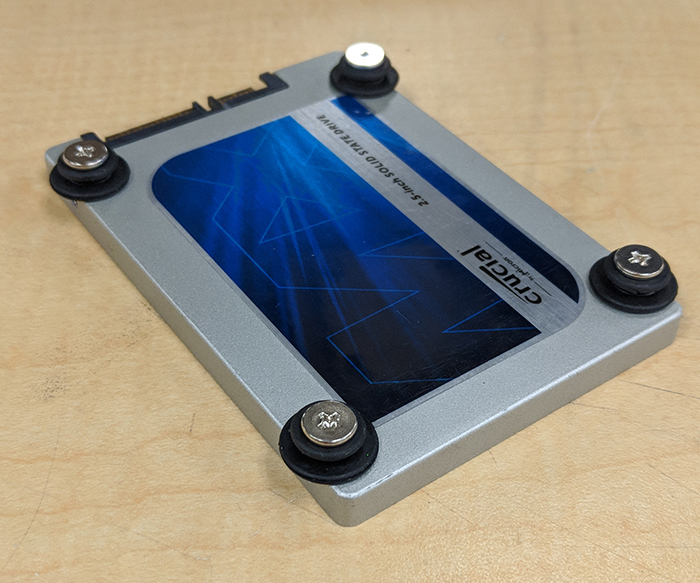
NX2 case
The NX2 is our newest small form factor (SFF) chassis, and is designed to be both compact and easy to move or transport. The NX2 can take a maximum of 2 drives, either two 2.5” drives or one 3.5” drive and one 2.5” drive. Depending on your motherboard, you may also be able to add one or even two M.2 SSD’s in addition to these drives. This tutorial will go over how to add both an extra 3.5” drive and a 2.5” drive.
Due to the compact size of the NX2, it is strongly advised to remove all of the panels on the case before proceeding. All of the panels are easy to remove, only requiring gentle prying with your fingers. Once all of the panels are removed, orient the chassis so that you are facing the motherboard directly. To the right of the motherboard will be the mounting holes for the 2.5” drive and if you look back at the center of the motherboard and then look directly above it you will see numerous holes for installing either a 2.5” or 3.5” drive. This spot is a little different than what you will in most other cases, as the drive will be mounted upside-down and the SATA connectors will be facing the back of the case.


Now that we’ve determined where the 3.5” drive will go, we need to get the drive ready to be installed. With the accessories that came with your system will be a small bag of screws that you will need to install in the hard drive. Unlike previous Velocity Micro systems and most computers in general, the screws and rubber grommets will be installed on the bottom of the hard drive, not the sides.


Don’t screw them down all the way, if you do it will be difficult to slide the grommets into place. In the next picture you will see which mounting holes will fit the 3.5” drive. Note that one of the screws won’t be visible from the top because it will be obscured by the handle.

Once you have the drive slid into place you can use a screwdriver to tighten down the screws. Don’t worry about the fourth one, three will be enough to hold the drive. Next, we need to connect the SATA power and data cables. This part can be a little tricky, and sometimes it may be easier to connect these cables to the hard drive first and then insert the drives into the mounting holes. If you have the drive installed without the cables, this is what you should see.
The best way to get the cables installed is to do the SATA power connected first.
The SATA power cable will be much easier to connect, though for the easiest possible installation we recommend using a right-angled SATA cable if you have one.


And that’s it for installing a 3.5” drive. Don’t worry about the drive moving, once you have replaced the glass panel, the drive will be completely held in place. Now you just need to connect the SATA data cable to the motherboard and you’re good to go.
Now we’ll cover installing a 2.5” drive. The mounting position for the 2.5” drive is immediately to the right of the motherboard and left of the front fan.
There are only four screw holes available, and the drive will be installed on this side of the panel. Here’s how it looks from the back.
Just like with the 3.5” drive, use the same screws and grommets and install them on the bottom of the 2.5” drive. Now, slide the drive in place so that the SATA connectors are facing downwards towards the bottom of the case.
See that little screw hole over the upper left corner of the drive? That’s for a small thumb screw that is also in the same bag as the other screws.
Go ahead and install that screw. This will keep the drive from moving out of place.
Just like with the 3.5” drive, we recommend using a right-angled SATA data connector if possible, but it’s not required. After that install the SATA power cable and you’re done.


How to reconnect the power connections in your PC
Sometimes it may be necessary to unplug some of the power cables in your Velocity Micro computer, either for troubleshooting purposes or for hardware upgrades. For clarification, “power cables” are the connections coming out of your power supply to power the motherboard, hard drives, and video card. These will include: ATX 24-pin connector, CPU 4/8 pin connector, PCIe (sometimes labeled VGA) 6/8 pin connector, SATA power cables, and Molex connectors. Molex connectors are rarely used these days, however some expansion cards (such as a USB 3.0 card) use them for additional power.
Note: Our technicians often secure loose cables and slack by using zip ties to clean up the wiring so you may have to snip these wires if you need extra cable length. If you have your own zip ties, feel free to use them, but they are not required.
Most power supplies are either non-modular or semi-modular, with higher-end ones being fully modular, meaning you can add or remove individual cables as needed. For example, if your system only has one video card and you only need one cable for it, you can leave the rest unplugged and use them later if needed. If your power supply is non-modular, then you are not able to add more connections as needed. The process for disconnecting and reconnecting power cables is pretty much the same across all of Velocity Micro’s case designs. The only variable is how much room you have to work with. For 24-pin, PCIe and CPU power connectors, there is latch on the connector and a latch catch on the receiving connector. Bear that in mind when reconnecting these three.
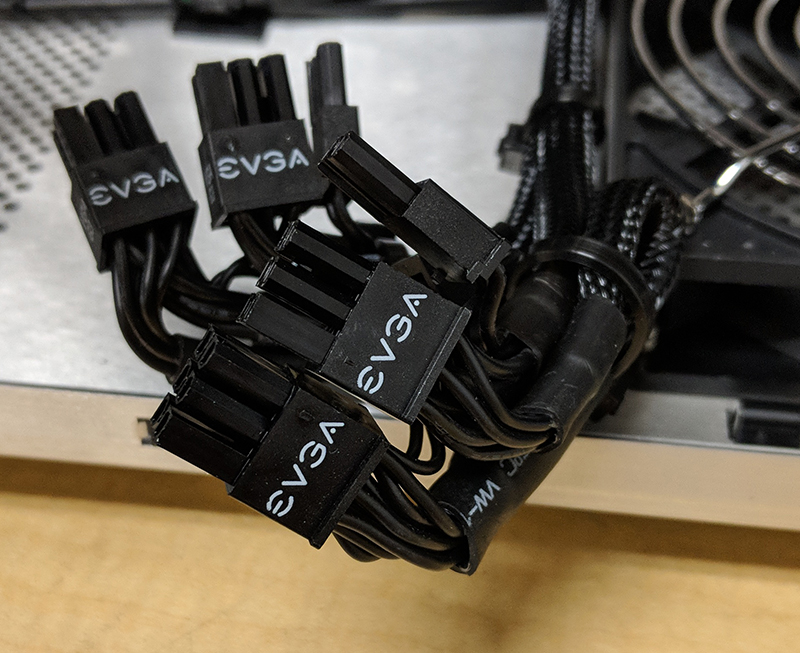
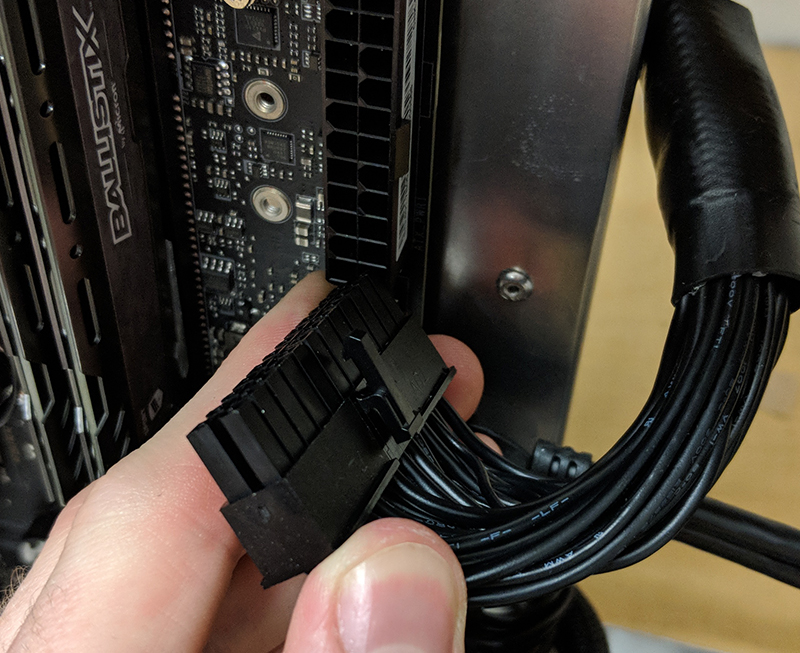
Start by removing both side panels and setting them to the side. Now, with the motherboard facing you, start by removing the power cables for your video card. Modern power supplies have PCIe cables that can either use 6 pins or 8 pins. Usually, two of the pins can separate and go unused if you don’t need them. If you have a VX or a GX4 case, then you may have two video cards, so make sure to unplug both. Also, depending on the video card, you may have to unplug an 8-pin and 6-pin connector. Both will have a small latch on either the top or the bottom that you will to squeeze in order for it to release. Squeeze the whole connector and gently pull it towards yourself. It should slide out without too much trouble. You can leave the cables hanging as they are and move on to the 24-pin connector. The 24-pin is almost always on the upper right side of the motherboard. Like the PCIe cables, there is a latch that holds the connection in place that needs to be released. This time it’s on the right-hand side facing away from the board. It may be hard to see, so try to feel it with your fingers if you can. Squeeze it so that you can feel it release and pull straight back from the board. You may need to gently rock it side to side to work it out. Once out, you can leave it hanging loose as it is. One thing to be aware of is that some 24 pin connectors have a section of 4 pins that can separate from the rest. This is for compatibility with really old motherboards, but that’s irrelevant for this guide. Not all 24 pins have this feature, just be aware that yours may. Next, we will need to unplug the CPU power cables. Similar to the 24-pin and the PCIe cables, the CPU cable can split in half to be a single 4-pin or join together to become an 8-pin. On many higher end boards, especially full size ATX or E-ATX ones, there will be an 8-pin and a 4-pin, or even two 8-pin connectors. As a general rule, CPU power connectors on the board are usually in the upper left corner and depending on what kind of CPU cooling you have may be difficult to get to. Also, like the 24-pin and PCIe cables, there is a latch that needs to be released before it can be removed. Squeeze the latch and gently pull the cable straight out.
Next, we’ll go over how to remove SATA power connectors. These are much easier to remove as they have no latches and just pull straight out. SATA power connectors are flat and narrow and have a distinctly “L” shaped connector. Make sure you have it oriented the correct way when reconnecting to your drives.
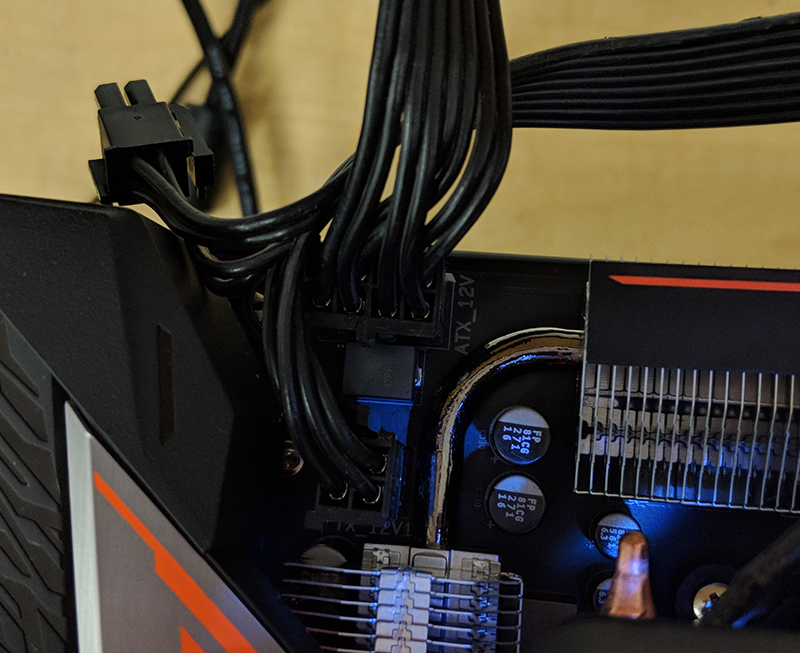
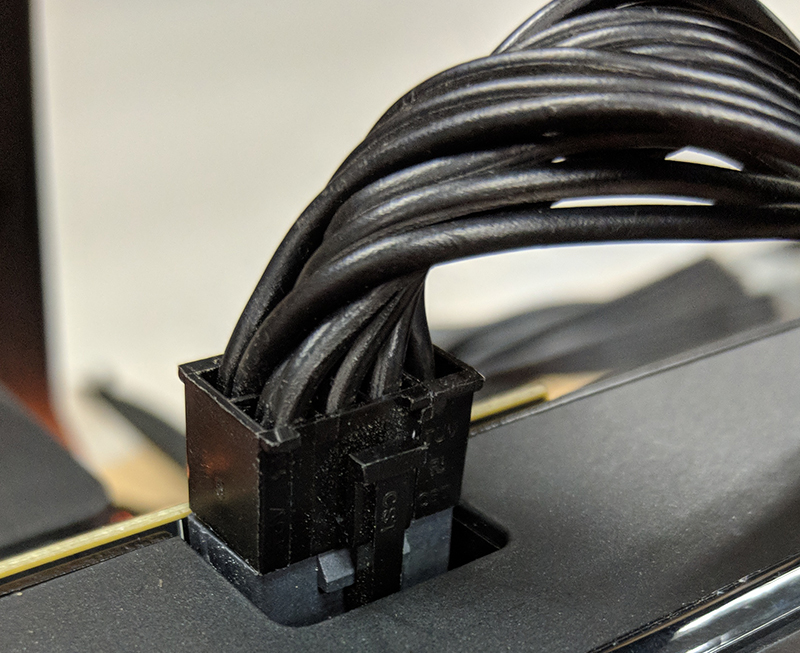
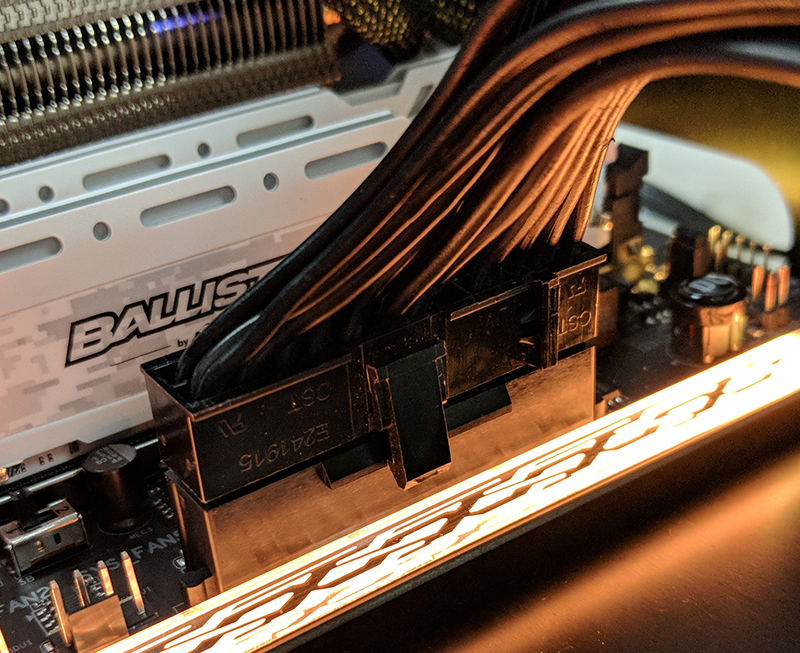
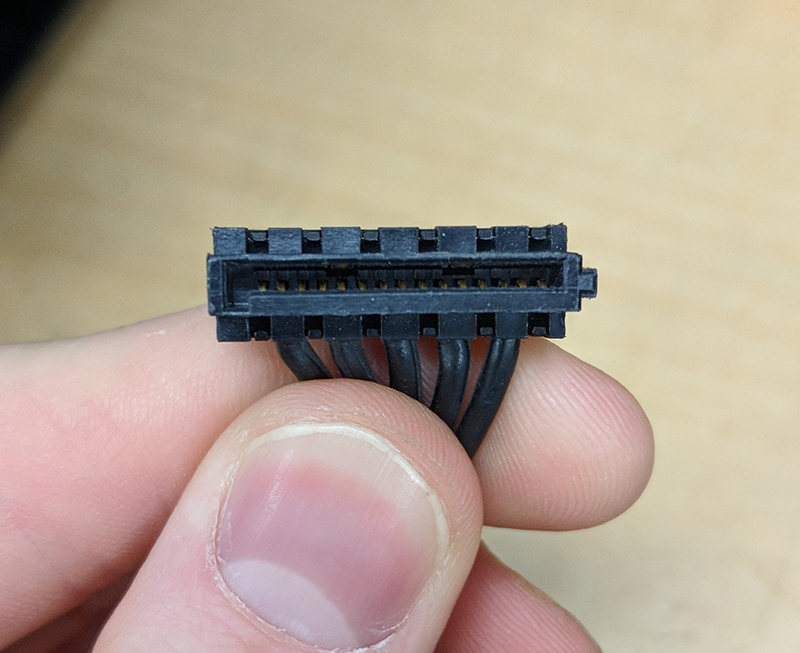
Lastly, there is the Molex connector. Molex is a very old standard that was mainly used to power PATA (also called IDE) hard drives and optical drives but is still occasionally used for things that need a constant supply of power (unlike newer connections that adjust their voltage based on demand). The only thing you are likely to see using a Molex connector is a USB 3.0 add in card. In any case, a Molex connector has four circular barrels arranged side by side. This part of the Molex is the “female connector.” Unfortunately, these have a tendency of becoming misaligned, so it may be necessary to use a small screwdriver head to adjust them. The male receiving end has four pins that will line up with the four barrels. Make sure to pay attention to the shape of both the male and female ends; one side of the Molex will be flat while the other has angled corners. Double check that you have aligned properly.
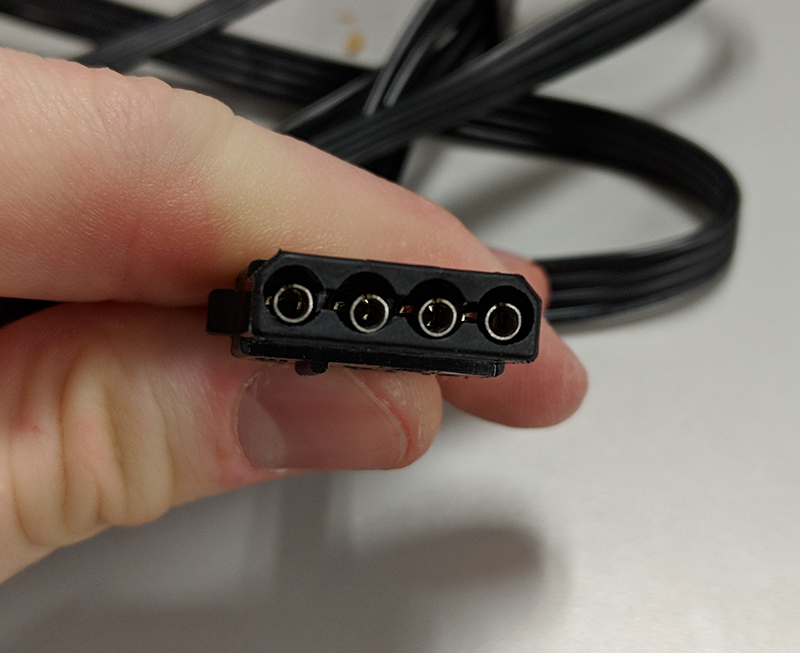
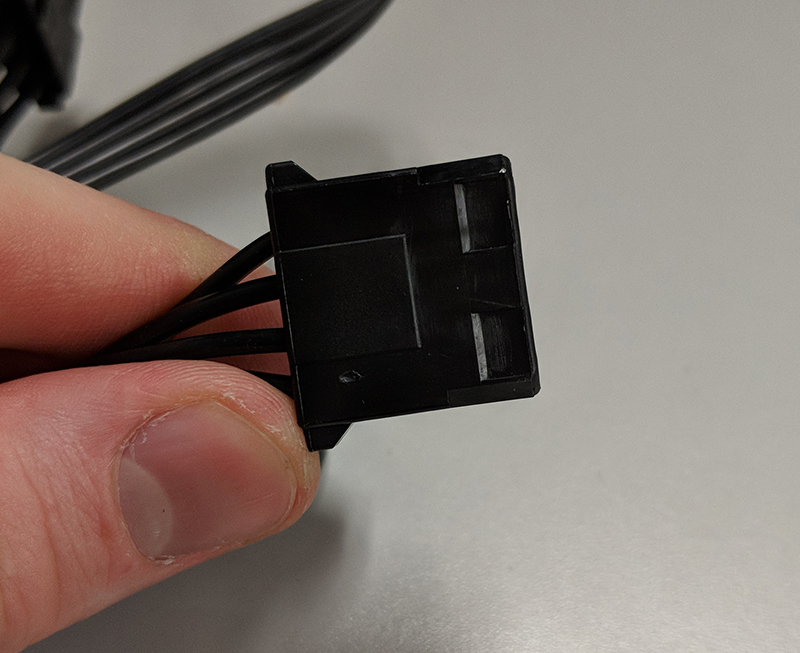
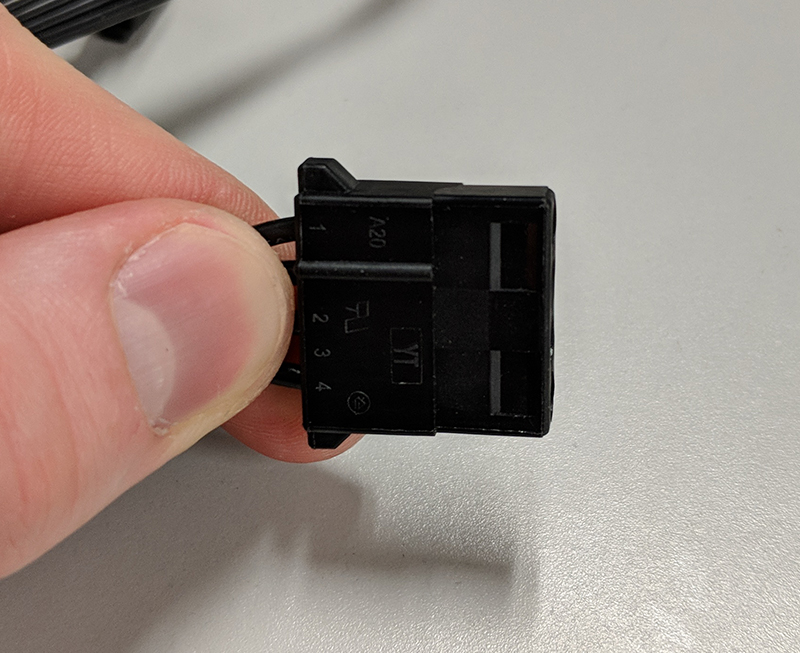
As stated in the beginning of this guide, you may have additional cables in your accessory bag if your power supply is either modular or semi-modular. These can be used to add additional drives or video cards or even upgrade your motherboard. If your power supply is not modular, then you will be limited to what cables it already has. If you would like to upgrade your power supply, please contact our support team.
How do I go about finding compatible RAM upgrades?
Sometimes adding more RAM to your system can increase performance and allow you to multitask more efficiently. However, depending on your configuration, you may already have the maximum amount of memory your system can support. This guide will help you determine if you can upgrade and how much you can upgrade to.
The amount of RAM your system can support depends on 2 factors - CPU and motherboard. The CPU can address a certain amount of RAM, which may be different than the amount supported by your motherboard. This is more common on older systems but does still apply to newer ones. NOTE: If you are still using Windows 7, be aware that Windows 7 Home Premium can only support 16 GB of RAM, even if your hardware can support more. If you want to use more than 16 GB, you will need at least Windows 7 Professional. If you know the model of CPU and motherboard you have, simply find the support page for each and check the specifications for maximum memory. If you are unsure, you can download a tool called Speccy to determine what your specifications are and then check the support pages for your hardware.
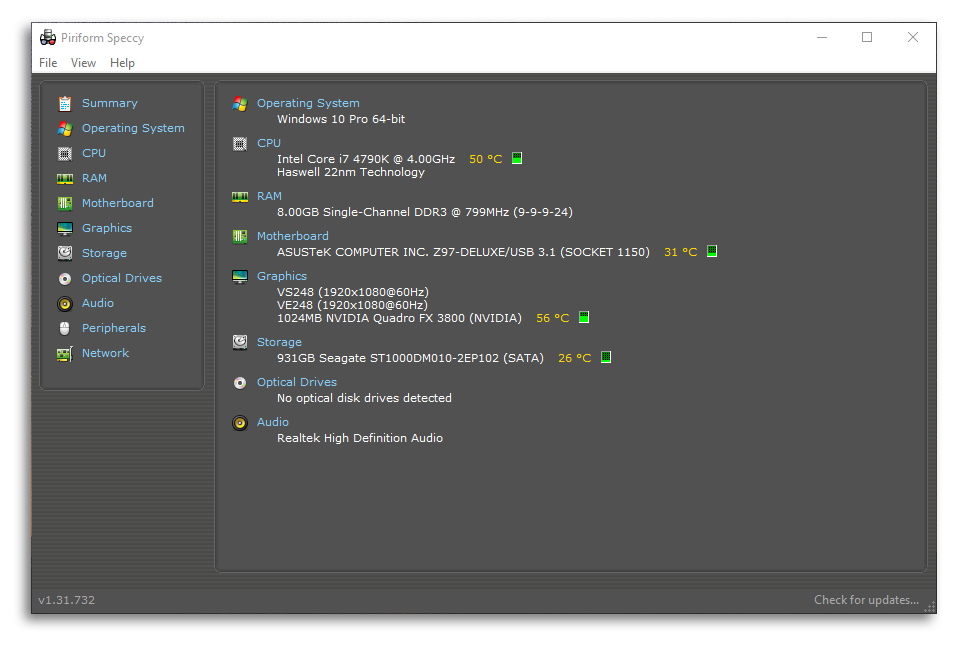
Once you have determined what your maximum memory is and decided you would like to upgrade, it’s time to pick your RAM. It’s highly encouraged that you get RAM that is identical to what you already have. RAM from 2 different vendors or even with 2 different speeds will probably work, but it is very likely that you will run into compatibility issue that may cause instability. Unfortunately, Speccy will not tell you what brand of memory you have, only the speed and capacity. To determine the brand of RAM, you can either check the original order from Velocity Micro if you have it or contact our support team with your warranty number ready so we can look it up.
What can I do if I think my liquid cool unit is malfunctioning?
If your liquid cool unit is malfunctioning and your system is still under warranty, it must be returned to Velocity Micro Repair Depot for repair or replacement. Onsite warranty service is is not available for these units. This is necessary as few field technicians have experience with these units. In addition, Velocity Micro needs to inspect the function of the repaired system in order to maintain the integrity of the remainder of the warranty.
My overclocked system has degraded, how can I get it back?
Since overclocking is defined as pushing a processor beyond it's normal safe limits by making certain modifications, overclocking can prematurely decrease the performance capability of the CPU. This is known as "CPU degradation". Overclocked systems can and often do naturally lose their overclock over the life of the system. As the CPU itself continues to operate, degradation of the overclock is not a cause for RMA. An overclock on a system is not guaranteed to remain.
How can you get it back? It is possible at times to tweak the settings of some systems to regain some lost overclocking. But this is rare and only delays the inevitability of further degradation. The most efficient way to restore an overclock is to replace the CPU with an identical CPU.
Due to company policy, we do not offer proprietary overclocking instructions to customers.
What are the symptoms of a failed or failing power supply?
The following may be indicators of a failed or failing power supply.
Some items may also indicate a failure or problem with another component.
- Power-on Fails (system fails to start or lock ups)
- Spontaneous Rebooting
- Intermittent lock ups during applications
- Hard drive and fan fail to spin up simultaneously (+12 failure)
- Overheating of power supply due to fan failure
- Small brownouts that cause the system to restart
- Electric shocks when the case is touched
- System completely dead and no LED lit on motherboard
- Smoke
- Circuit breakers popping when the computer is powered on
What are the possible symptoms of a failed video card?
Artifacts
- Software causes - Occur after windows load
- With one application: troubleshoot the program with the program publisher
- With multiple applications: bad driver versus bad hardware
- Update Chipset driver, Uninstall then Install latest video driver
- If 1 does not resolve the issue, replace the card
- Hardware causes
- Prior to Windows Load – replace the card
- Overclocking of GPU (can take weeks or months to show up)
- Overheating of GPU (possible fan failure)
- Video RAM failure
- PCI-e slot failure
Flickering Video
Display goes black during use
No display
How can I tell if my hard drive is failing or has failed?
Software and hardware problems may cause identical symptoms with a hard drive. It may be necessary to rule out the software causes before confirming that a hardware issues exists.
- Clicking: indicates a probable head crash, may also indicate electrical issues or damage to the platters (can also be an aftermath of dropping.) This will also have a hardware cause.
- BSODs: can be during boot, while running an application, can also be associated with corruption, viruses, Trojans, etc. (i.e. software or hardware.) Rule out software causes. Run appropriate hard drive diagnostics.
- New message indicating drive is not formatted (can be caused by software or by electrical surges)
- Boot loops: possible virus or Trojan in the boot sector
- System lock ups and freezes: possible bad sectors or can be software or resources related
- Drive not found: Check connectors (SATA and Power), BIOS settings, RAID settings if appropriate
- Operating System not found: Check BIOS settings, possibly a Hard Drive priority cause
Velocity Micro does not offer any type of data backup or recovery.
What do I do if my hard drive has corrupt sectors or my file system may be corrupt?
Estimated difficulty and completion time: up to several hours depending on size of drives and results of scans, low difficulty.
Signs that you might have a hard drive corruption or failure may include but are not limited to: Blue Screens of Death (BSOD’s), sudden application crashing, file corruption and Windows failing to start up occasionally. There are a few ways to fix or alleviate bad or corrupted sectors, but the older your hardware gets, the more frequently these issues will appear.
First, if your system is experiencing BSOD’s fairly frequently or having trouble booting into Windows, we suggest running a System File Checker (sfc) scan, which checks critical Windows files for corruption and fixes them, if possible. To do so, right click on the Windows Start Menu in the lower left of your screen and select “Windows PowerShell (Admin)” from the popup. NOTE: Depending on your settings it may say “Command Prompt (Admin)” instead. Either one will work. Once it is open, type “sfc /scannow” without the quotation marks. The scan will take some time to finish, and may give several different messages upon completion. If the scan seems to finish very quickly (3 minutes or less, generally) then that is a sign of corruption of Windows files. In any case, when it does finish it will give some output, usually one of 3 outcomes.
- Sfc scan found no integrity violations.
- Sfc scan found and repaired corrupt files.
- Sfc scan found corrupt files but was unable to fix some of them.
If you get result 1, then chances are that your Windows installation is not the problem. If you got result 2, restart your system and continue to use as normal but keep note of any more irregularities or instability. Even though sfc found and repaired errors, they may not have been the only cause of your issues. If you got result 3, then your system definitely has some Windows corruption. At this point, some of your options may be to revert to a previous Restore Point, to reinstall the bootloader (if you are having issues booting), or to back up your data and perform a fresh install of Windows.
If you would like to check your hard drives for any bad sectors or corruption, you can do so with the chkdsk /r command. To run a chkdsk, open a Windows PowerShell or Command Prompt as admin, and type “chkdsk /r” without the quotation marks. If you are trying to run chkdsk on your primary (C:) drive, note that chkdsk cannot run on any drive that is currently being used by Windows. The command prompt will tell you that a chkdsk will be run the next time the system boots. If you want to run the chkdsk immediately, simply reboot the system. After you see the Velocity Micro screen, the chkdsk should automatically start running. Depending on the size of your hard drive, it will take some time to complete. Once complete, the output will give you a rundown of how many bad sectors, clusters, etc. were found and repaired. The system will either reboot or continue into Windows. Continue to use your system as you normally would but keep an eye out for more issues that may arise.
Once I have my Velocity Micro system, can I upgrade its hardware?
Yes. You can upgrade your own system, but beware. User-incurred damage may result and this is not covered under your warranty. Also note that some modifications can so drastically change your system that it is no longer the same Velocity Micro system and cannot be covered under warranty. To protect your warranty, please submit a ticket at our Support Hub if you have questions about your upgrade.
We also offer a comprehensive, lifetime upgrade policy for all systems sold. Lifetime Upgrade Plan allows you to return your system for maintenance, upgrades, and tuning.
Velocity Micro Lifetime Upgrade Plan
Anytime during the life of your PC, you have the option to return your system to our factory for basic interior cleaning, general maintenance, driver and BIOS updates, operating system updates, discounted component hardware upgrades, and standard performance tuning and benchmarking. Generally suggested every 15 to 18 months for optimal performance and longer lifespan. Get started HERE
Components You Can Upgrade or Replace:
- Motherboard
- CPU
- CPU heatsink/fan
- Memory
- Video Card
- Sound Card
- Network Card
- Optical Drives
- Hard Drives
- Case Fans/Quiet Case Fans
- Case Lights
- Power Supply
Prices begin from $299 plus hardware component upgrades and material used, any additional labor required, and return packaging material. Any work done will be carried under the original warranty or for 1-year, whichever is greater. Customer is responsible for backing up all data prior to shipping the system to us, and we specifically reserve the right to erase your hard drive and delete all data from your computer if needed to improve performance without further notice to the customer. Due to the individual nature of each system, you must contact Velocity Micro Customer Care Department in advance to plan your upgrade. Non-operable systems will be repaired at our regular repair rates at the time of receipt of the system. Allow up to 10-14 days for upgrades. Prices and terms of this plan are subject to change without notice. Other terms apply, contact us for complete information.
Why doesn't Windows recognize my second hard drive?
If it’s a new, unused drive, you will need to format it before Windows can use it. This is a very simple process. Start by right clicking on the Start Menu in the lower left corner of the screen and choosing Disk Management from the popup. Give it a few moments to scan your disks and if Windows recognizes you’ve installed a new, unformatted drive it will ask if you want to initialize the drive in Master Boot Record (MBR) or GPT (GUID Partition Table) format. Unless you know you need the drive to be configured as MBR, choose GPT. GPT is required for drives greater than 3 TB capacity, as NTFS file systems cannot address more than about 2.2 TB without using GPT. In the bottom half of the Disk Management screen, you will see a list of all your drives and partitions and their associated drive letters, if they have any. On the left you will see the drive numbers, and to the right of that you will see their partitions and volumes. You are looking for a drive that has only unallocated space to the right of it. Right click anywhere in the unallocated space and select “New Simple Volume.” This will bring up a wizard walkthrough allowing you to configure the drive capacity, volume label, drive letter and format options (if it’s a brand-new drive, it’s safe to just do a quick format). Give it a few moments and Windows should give you a notification that it’s ready to use. Make sure to not close Disk Management until the format is complete or it will not finish. If you added a drive that already has data on it, for example from an old computer, it will already be initialized but may or may not automatically be assigned a drive letter. In case it doesn’t, however, simply go back to Disk Management, find the drive that doesn’t have a letter assigned to it and right click in the volume and select “Change drive letters and paths.” A small window will pop up with three buttons, two of which will be greyed out. The one can click will say “Add.” Click that and choose a drive letter from the drop down. Click OK to close both windows and your drive should be good to go.
If your drives do not show up in Windows Disk Management, there may be an issue with either the drive or the cable. Restart your machine and go to the BIOS and check the SATA configuration. Here, it will list all SATA devices that are currently connected to the motherboard and what SATA port they are attached to. If you do not see your device listed, power down the machine and double check the connections to the drive. If it still doesn’t show up, try contacting our support team for assistance.
How To Install An M.2 Drive?
M.2 is one of the most exciting technologies currently available and represents the future of storage in computers. M.2 drives do not require any wiring for data and power and take up almost no space in a system. M.2 also allows you to use NVMe drives, which are the fastest storage drives currently available. This guide will go over the differences between different kinds of M.2 drives as well as how to install them in your system.
The first thing to know is that not all M.2 drives are the same. M.2 is a connection type, not an indication of speed. Some M.2 drives are the same speed as a conventional SSD using AHCI (more on that later), while others use the newer and faster NVMe standard. It’s also important to note that not all M.2 drives will fit in all M.2 sockets. There are 2 main connector types for M.2 drives; key B and key M. Key B is used primarily for non-NVMe M.2 SSD’s, whereas key M is primarily used for NVMe capable drives. There are a few other key types, but they are fairly rare and obscure so we won’t go over them here. There are also different length M.2 drives, but those are also uncommon. It’s also worth noting that some M.2 drives may have both key B and M and will fit in a socket keyed for either. However, key M M.2 drives are always NVMe. With only a few exceptions, most boards currently available can support either key M NVMe SSD’s or key B (or B + M) non-NVMe SSD’s.
NVMe
Before getting to how to install an M.2 drive, it is worth going over why NVMe is a big deal. Back in the early days of computing, AHCI (Advanced Hardware Configuration Interface) was developed to allow operating systems to use mechanical drives. At the time, flash storage like SSD’s did not exist, so AHCI was never intended to work with them. Eventually, SATA reached version 3, with a maximum of 6 Gbps transfer speeds. Unfortunately, this is probably as fast as it will ever get on its own, as the AHCI standard has reached its limit. That’s where NVMe comes in. NVMe was designed from the ground up with flash storage in mind and is only going to get faster in the next few years. NVMe uses the PCIe bus, the same bus that video cards use to achieve fast data throughput. Current M.2 drives can get up to 32 Gbps transfer speeds, or 6 times as fast as a SATA 3 SSD. Because of this, NVMe drives make the best boot drives for a new system.
Installing the drive
Now we’ll go over how to install an M.2 drive. Fortunately, this is a very simple process since they don’t require any wiring. The only things you will need are a small Phillips head screwdriver and possibly a 5mm hex screwdriver, but not every system will require this. The first thing to do is to find an open M.2 socket. Depending on the motherboard, there may be up to 3, with some hidden below the video card or under parts of the motherboard. If you aren’t sure where to look, check the motherboard’s manual. Some boards provide a heatsink with pre-applied thermal pads for cooling. If your board uses this, make sure to take advantage of it as it will definitely improve performance. In the accessory bad that came with your Velocity Micro order, there should be a small bag of screws used for mounting an M.2 drive. Keep in mind that they are very small and easy to lose. If you aren’t sure what they look like, the motherboard manual will have a list of all parts and accessories that were included. Again, depending on the board, there will be a very small Phillips heard screw and possibly a small hex screw. Some boards may have one or both already pre-installed. Once you’ve determined if you need the screws and where you are going to install the drive, it’s time to connect it. If your board does not the hex screw pre-installed, install it now with the 5mm hex screwdriver. Be careful not to overtighten it. Most M.2 sockets have multiple spots for this screw, depending on the length of the M.2 drive. The most common length is 80mm, and most boards have a label beside each hole denoting the length. Now take the drive and line up the side with the gold contacts with the socket on the board, paying close attention to the notched cutout on both. Make sure they align properly when inserting. After insertion, the drive will not lay flat in the socket, but rather sit up at a 45-degree angle. The socket is spring loaded so that it pops up like this for easy removal. Gently push the drive down with your finger and align the semi-circle cutout with the top of the hex screwdriver. Now take the small Phillips head screwdriver and secure the drive down with the small screw. And that’s it, your M.2 drive is now installed. But that’s only half of the process to get it working.
If you plan on installing Windows to the M.2, the installation process is more or less the same, at least initially. If the M.2 is non-NVMe, then you shouldn’t need to do anything else post installation. If it is NVMe, go through the install like you normally would, but when you are installing all of your drivers you will need to grab an additional driver. The driver adds NVMe compatible code to the Windows storage controller. Without it, your NVMe SSD will only perform at about half of its rated speeds. You will need this driver even if you are using an NVMe drive as a storage drive. Another thing you should download is the manufacturer’s utility for monitoring the drive and updating its firmware. Updating the firmware is highly recommended. See our guide on keeping your SSD's healthy for more on that. One thing to note for Windows 7 users; if you plan on installing Windows 7 to an NVMe SSD, you will need to sideload the NVMe driver during installation or you will get BSOD’s on boot every time.
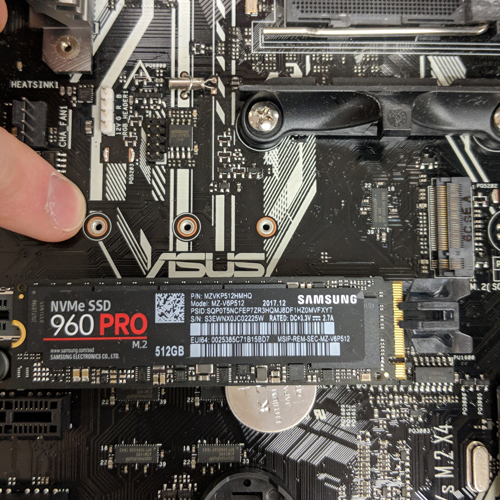
Finding the M.2 slot
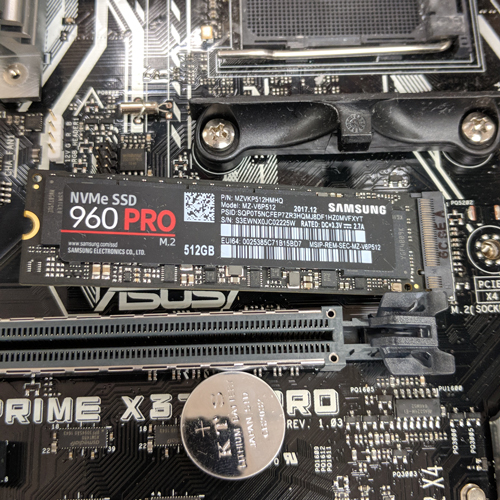
Inserting the drive
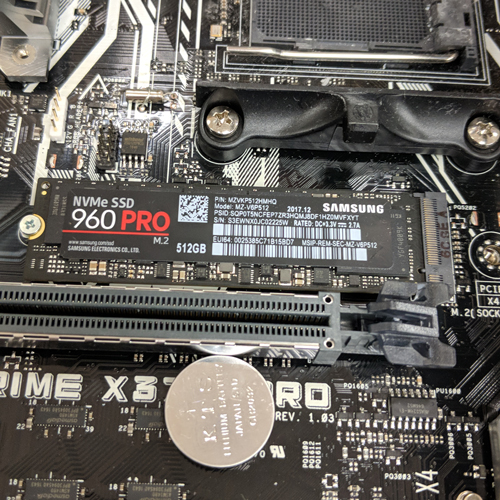
Securing the drive
