Startup Support
Velocity Micro's award winning Customer Care, the premier source for information on your Velocity Micro PC. To help answer your questions and address support issues, our team of experts have compiled this library of walk-throughs, downloads, and FAQs. This information is updated, expanded, and refined on a daily basis to ensure you have the very latest information available.
Skip to
How can I boot my PC quicker and use less memory?
The best way to help make boot times a little faster is to change which programs run at startup. To do this in Windows 10 or 11:
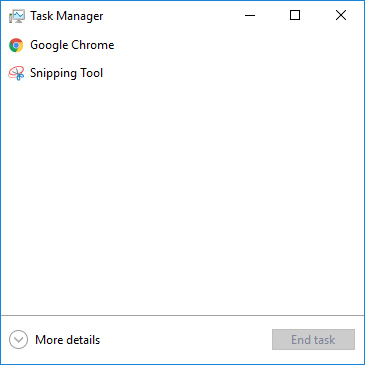
1. Right click anywhere in the Windows Task Bar and select "Task Manager". Alternatively, you press CTRL+SHIFT+ESC on your keyboard to bring up Task Manager directly. The default view is just your currently running programs, but in the bottom left of the window you'll see a button for "More Details."
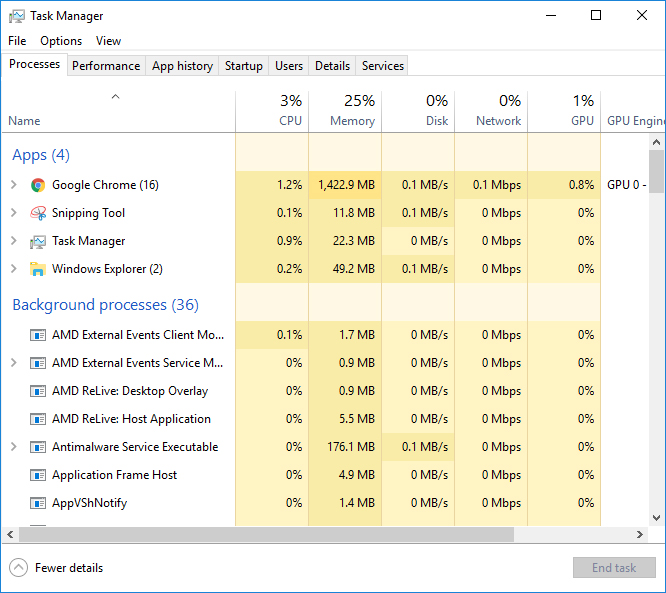
2. Click that and you'll see tabs for processes, performance, services, and startup. Click the tab says Startup and you’ll see all the programs that are set to run when Windows starts.
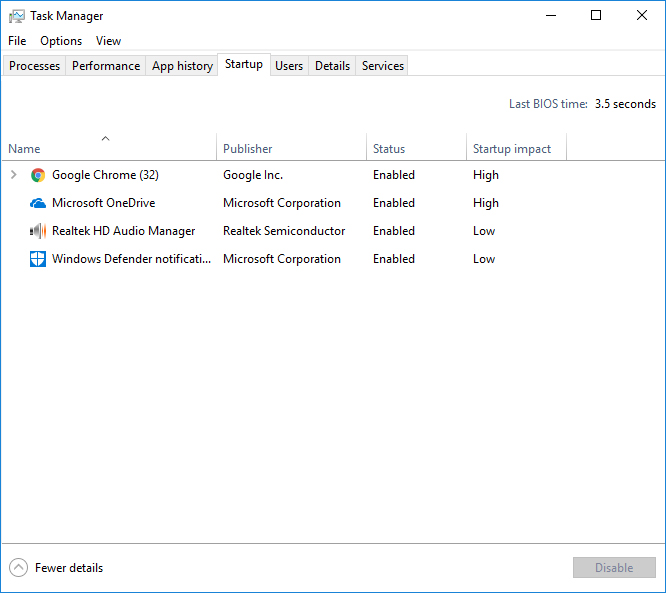
3. On the right, you’ll see much of an impact disabling that process will have on boot time. To disable any program, simply left click it and then click "Disable" in the bottom right. As for what programs you should consider disabling at startup, that depends on what your needs are. If you need a certain program to run immediately after booting, then leave it enabled. Programs that you may not want to run at startup may be things like music players, some office programs, or photo/video editors.
System will not power on
First, review these basic troubleshooting steps before continuing.
- Be sure the power cord is firmly connected to the PC.
- Be sure the power supply unit (PSU) switch set to ONE, “1”, not ZERO, "0".
- Be sure to test by switching to an alternate power outlet.
- Be sure that the front power switch is operational and wires are properly connected to the motherboard.
If the motherboard LED is not lit:
- Unplug rear power and press the front power switch several times.
- Reconnect the rear power. Reseat power connections to the motherboard.
- Ensure 20/24-pin power and 4/8-pin auxilliary power are firmly connected.
If the motherboard LED is lit but the PC still does not power on, disconnect all peripherals and test if the PC will power on. If successful, reconnect each peripheral one at a time to determine the culprit.
If the PC still does not power on, remove RAM, and test with one module at a time.
If the PC still does not power on, disconnect HDDs and optical drives and test again.
If none of the suggestions above work, there may be a problem with the motherboard or Power Supply. You will need to have your system serviced.
Can I set up my system for dual boot?
This is possible though it is not recommended as we can only provide support for:
- The original, unmodified operating system and device drivers
- The original, unmodified computer hardware and components
This means you can install a second disk drive with another operating system on it and still receive support for your original disk and operating system. If you need assistance with your system's boot configuration, VM Support can try to help you restore your original configuration.
We cannot, however, assist you with any of the following:
- Dual boot configurations
- Windows 11 BCD editing or utilities
- Partitioning software
- Hard disk imaging or backup software
- 3rd party hard disk installation
- 3rd party operating system installations or driver support
- Changing the original RAID configuration into non-arrayed independent disks
- Problems arising from changing your boot configuration
How do I disable automatic restart on system errors?
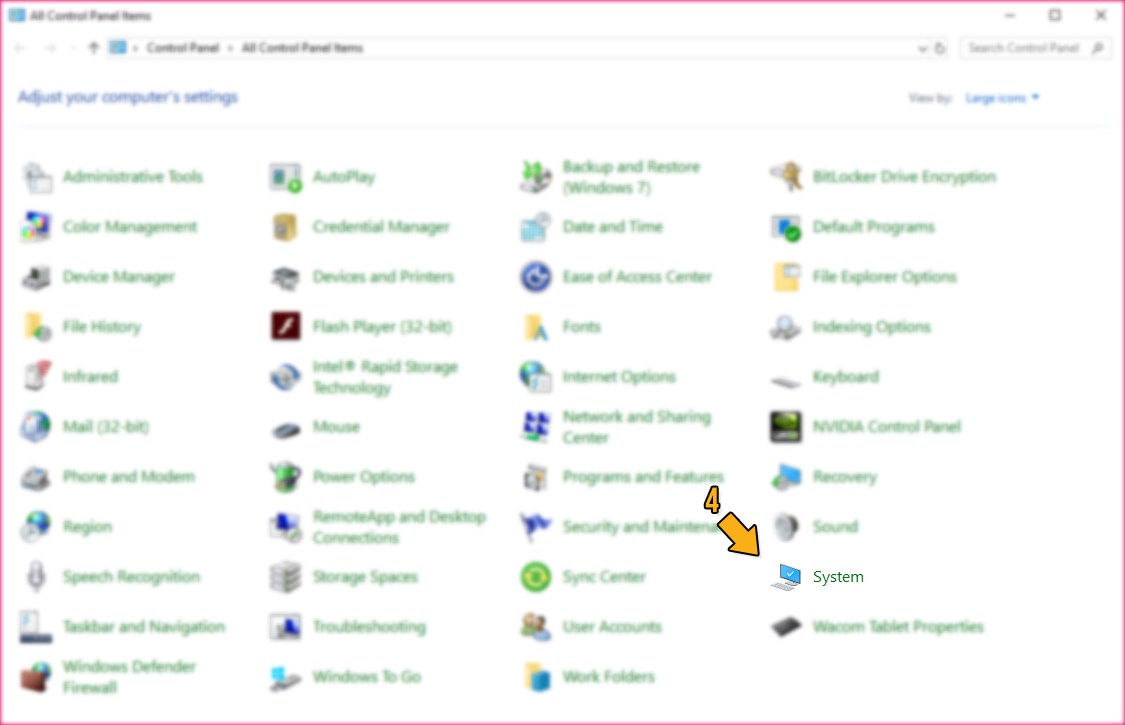
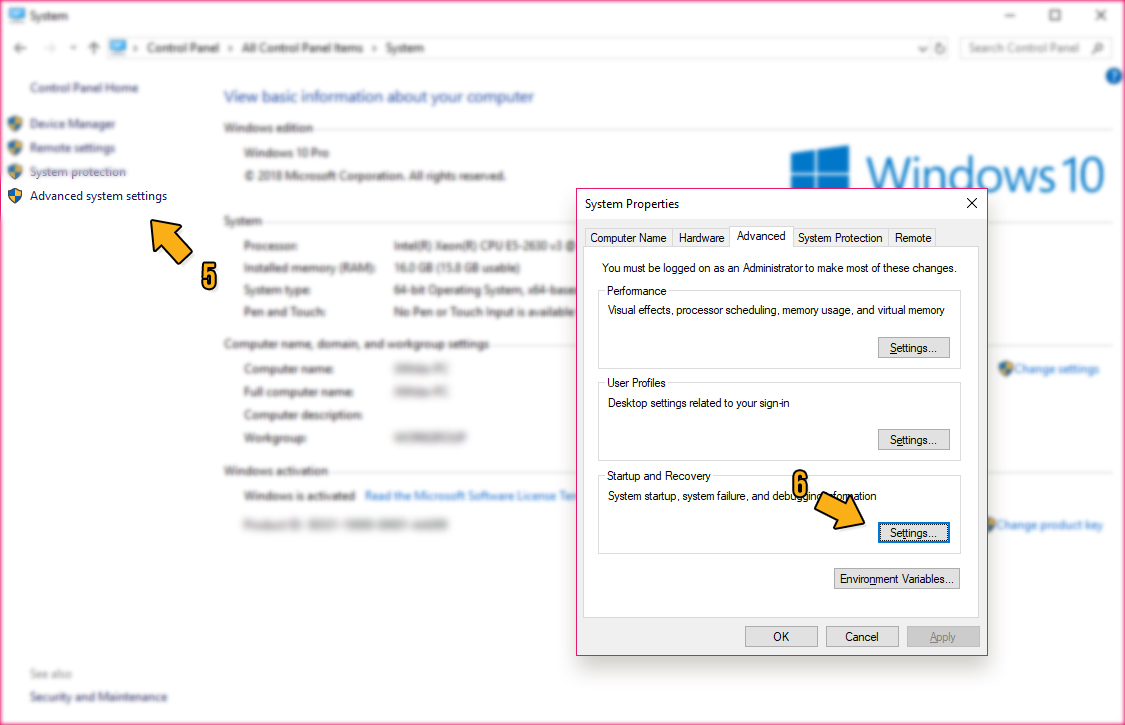
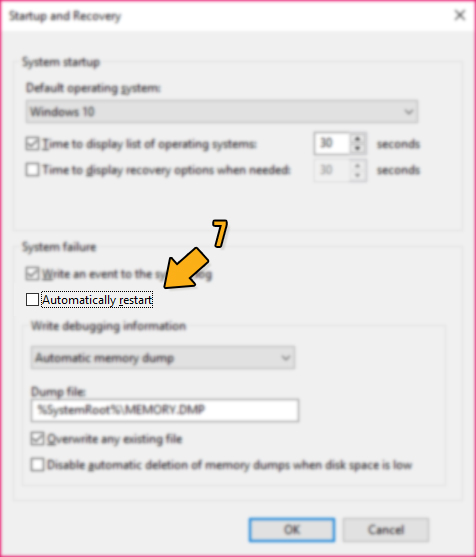
When your PC encounters an error that it cannot safely recover from, the default action is to restart the system. This automation makes it difficult to troubleshoot the error as it is only on the screen for a few seconds. Follow the steps below to disable this default action.
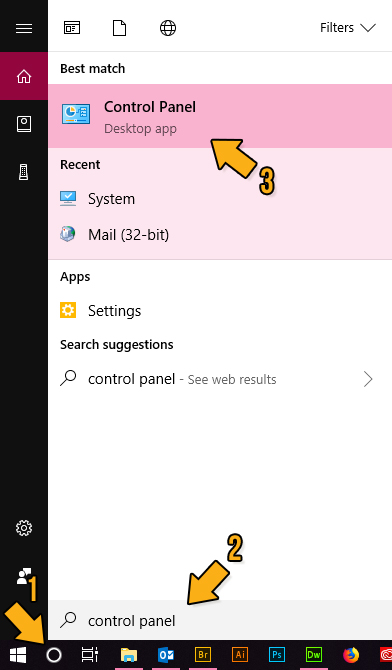
Click on the start button and search for Control Panel > Click the System icon > Click on Advanced system settings, then under Startup and Recovery click Settings > Make sure the Automatically restart checkbox is unchecked.
The computer is turned on but there is no image on the monitor. What should I do?
Follow the steps below, checking between each step to see if video has returned to your display.
- Make sure the monitor's power switch is in the ON position.
- Make sure the monitor is plugged into a power outlet that is receiving power. If it is plugged into a surge protector or power strip, confirm that the unit is plugged in and turned on. Confirm that other devices connected to the unit are receiving power. Some of these units contain a surge protection fuse which may need replacing if no devices are receiving power.
- If necessary, reset the monitor or adjust the brightness and contrast controls on the monitor to make sure they are not darkened.
- Make sure the video cable is plugged into the primary port or Port 1 on the active video card, not the motherboard video outputs.
- If you recently moved your system, unplug the video cable and make sure the pins on both ends are straight and not bent at all. (If any pins are bent, gently correct any bent pins with the tip of a retractable ball-point pen or small screwdriver and then reconnect the cable.) Tighten the thumbscrews on the cable's connection to the system.
- Make sure the video cable is also plugged into the monitor. If your monitor has more than one video port for input, only connect one cable as connecting more than one can cause display confusion.
- With the system unplugged, carefully open up your system's case and make sure the video card is securely fastened in its slot and re-seat it if necessary. Unplug and re-seat the supplemental power connection on your video card if present.
Why does my computer beep when it starts up?
A certain number of beeps are healthy and normal sounds for a computer to make when booting up. The trouble comes when the computer hangs or does not display an image upon boot up. In these cases, the motherboard will beep a certain number of times depending on the problem it is encountering. Refer to your motherboard manual and look for the "Beep Codes" section which will translate the number of beeps into a problematic area. This effort will help technical support diagnose and fix your problem more easily.
During startup, what key do I press to access the BIOS on my system?
Motherboards |
BIOS Setup |
Select Boot Dev. |
|---|---|---|
| Intel | F2 / DEL | F4 |
| EVGA | DEL | ESC |
| Gigabyte | F2 / DEL | F12 |
| SuperMicro | F2 / DEL | F11 |
| Asus | DEL | F8 |
| ASRock | F2 / DEL | F8 |
| MSI | DEL | F11 |
Notebooks |
||
| All | F2 | F7 |
RAID Controllers |
||
| Intel Desktop | CTRL+I | |
| Intel Server | CTRL+E | |
| LSI | CTRL+L / CTRL+I | |
| Adaptec | CTRL+A |
I tried to access the BIOS on system startup but cannot. It just proceeds to load Windows.
You can access the BIOS on most motherboards by pressing the Delete [DEL] key repeatedly while the POST messages begin to scroll.
Some require a Function Key like F2 or F4 to enter the BIOS setup utility. If you watch carefully during the POST process, the system may display which key to press in order to enter the BIOS setup program. The BIOS splash screen may need to be disabled to see this.
Hint: If your keyboard is equipped with a "F Lock" key that toggles the Function Row on or off (the default on system startup is OFF), then be sure to turn on your Function Row by pressing the "F Lock" key first.
